
As well there is an option to additional filter fabric inside. As a fabric choice, you need to see what you have, not all kinds of fabrics protect. Please, choose the required fabric type for protection or use any to make a face mask as a supplement.
Some guidelines from CDC regarding face masks.
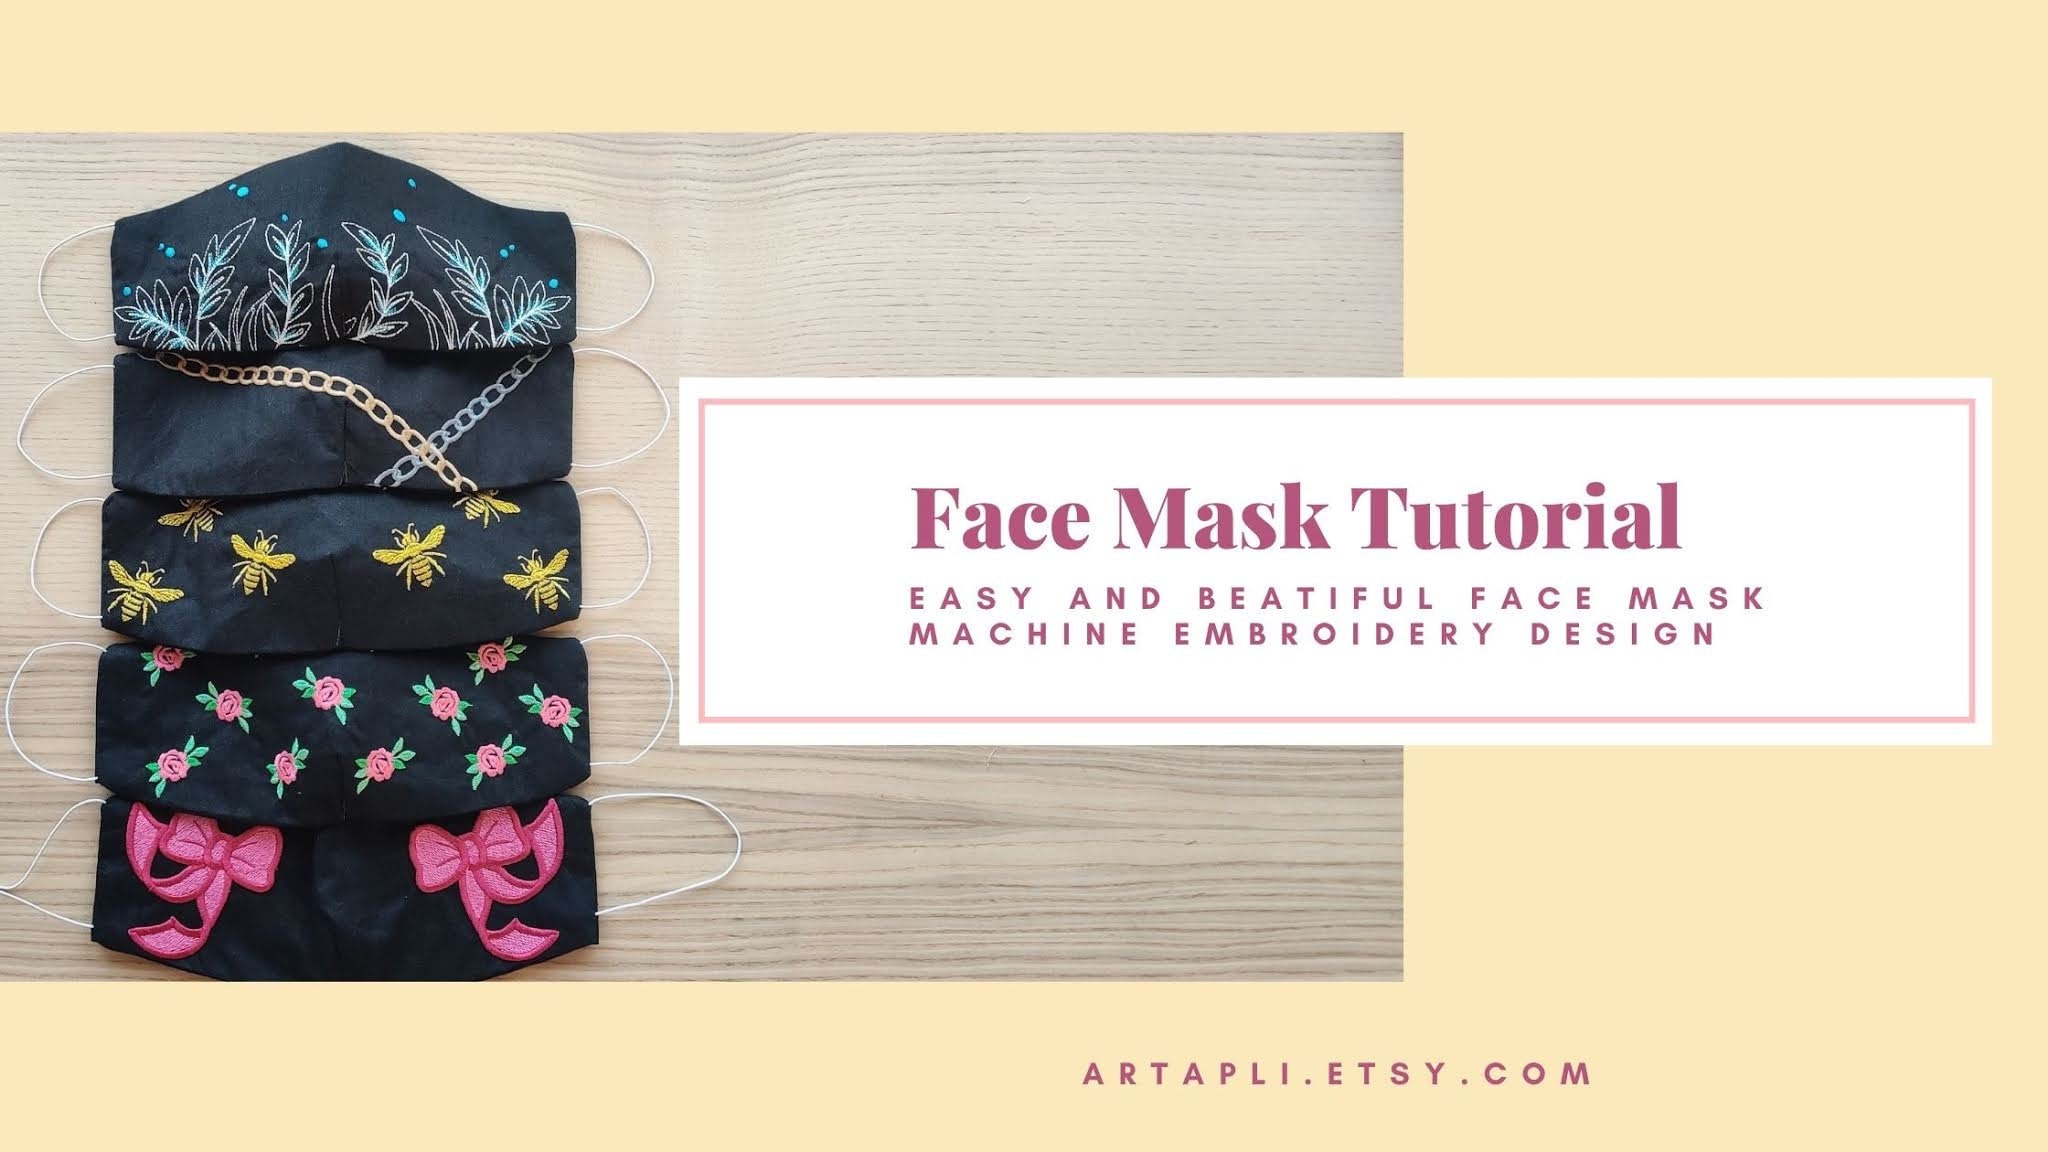
To make your own face mask, you need the Face Mask machine embroidery design. Choose one of them from my shop here: Artapli.etsy.com
For example:
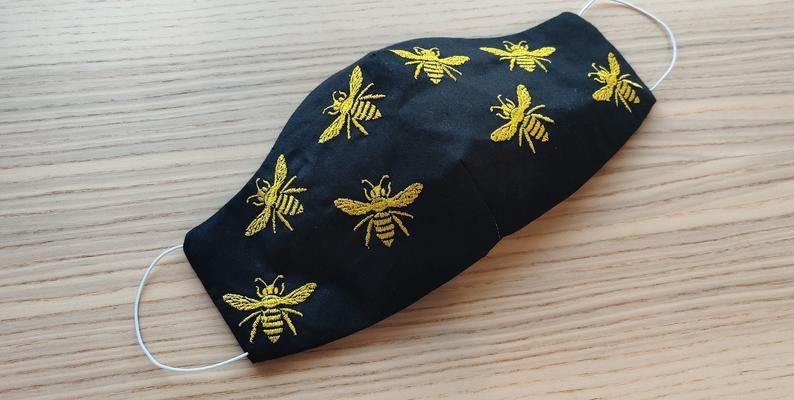
A. Face Mask embroidery design - Bees
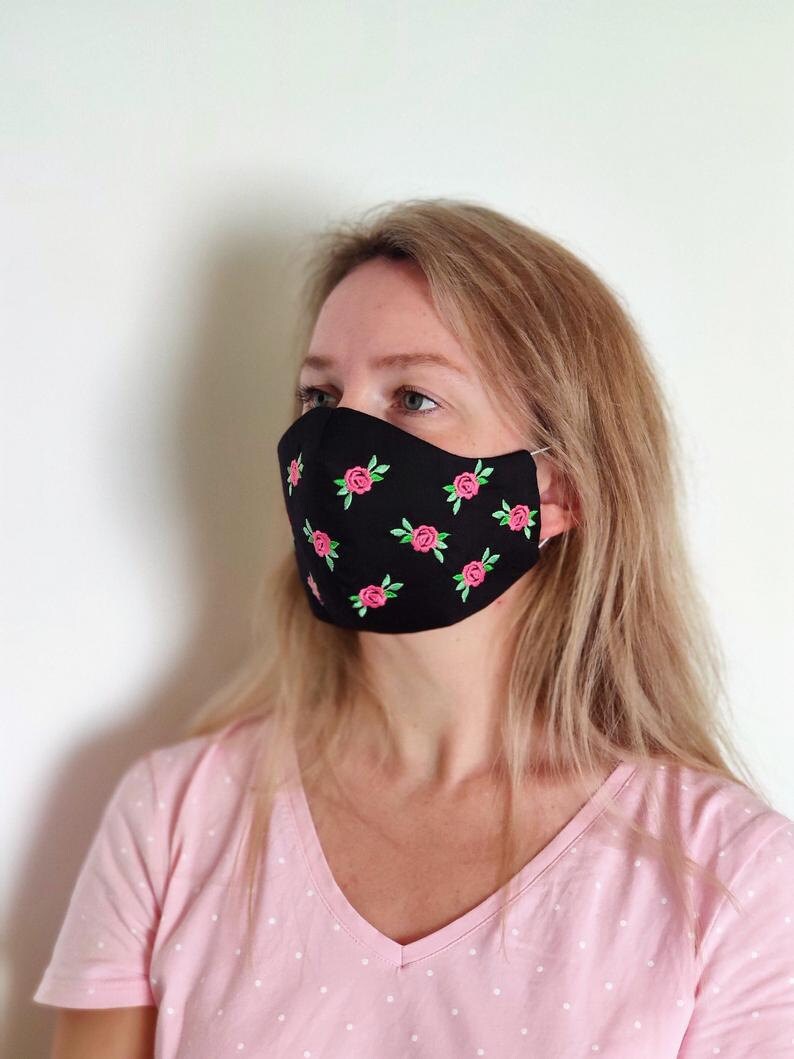
B. Face Mask embroidery design - Roses Flowers
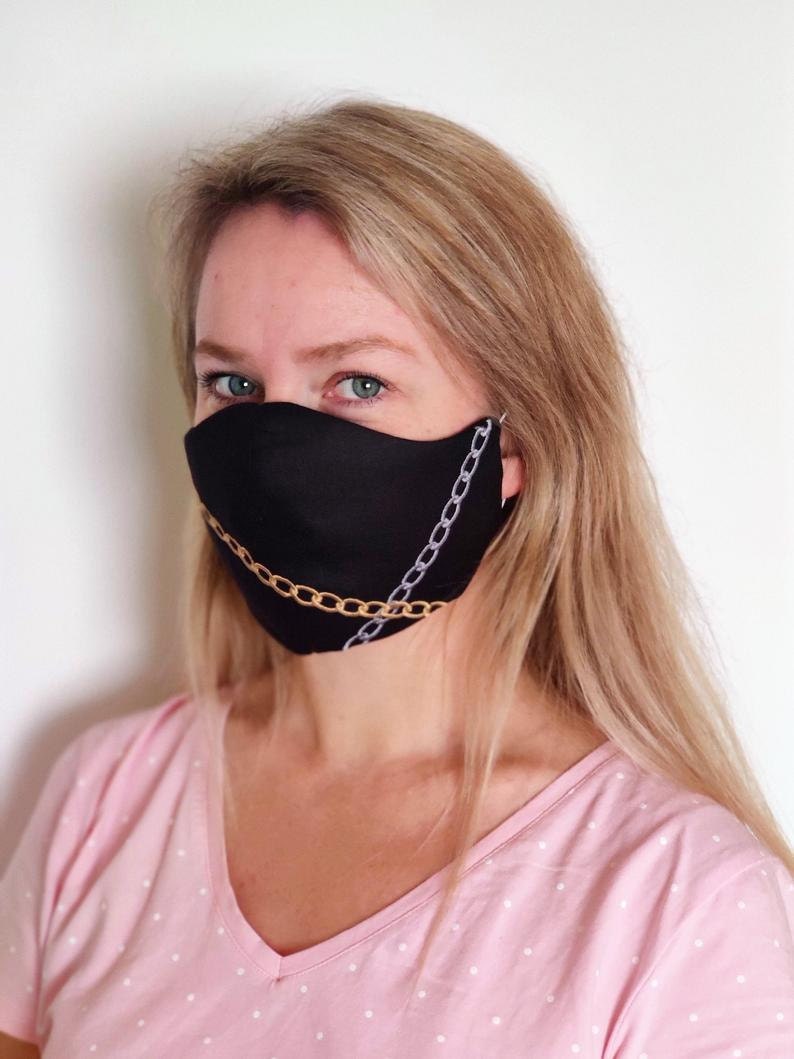
C. Face Mask embroidery design - Gold and Silver Chains
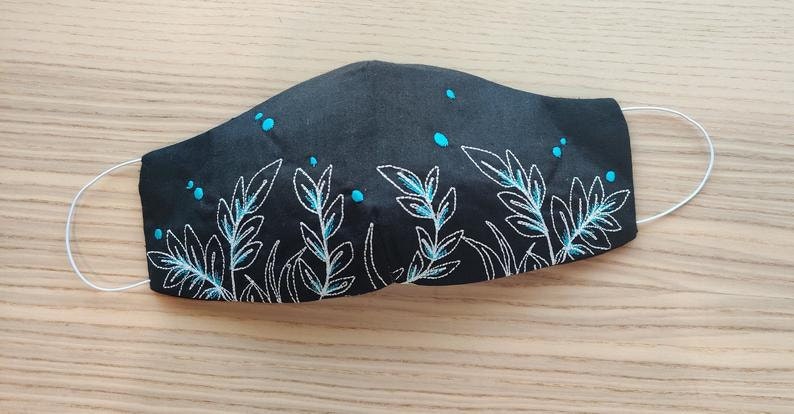
D. Face Mask embroidery design - Leaves

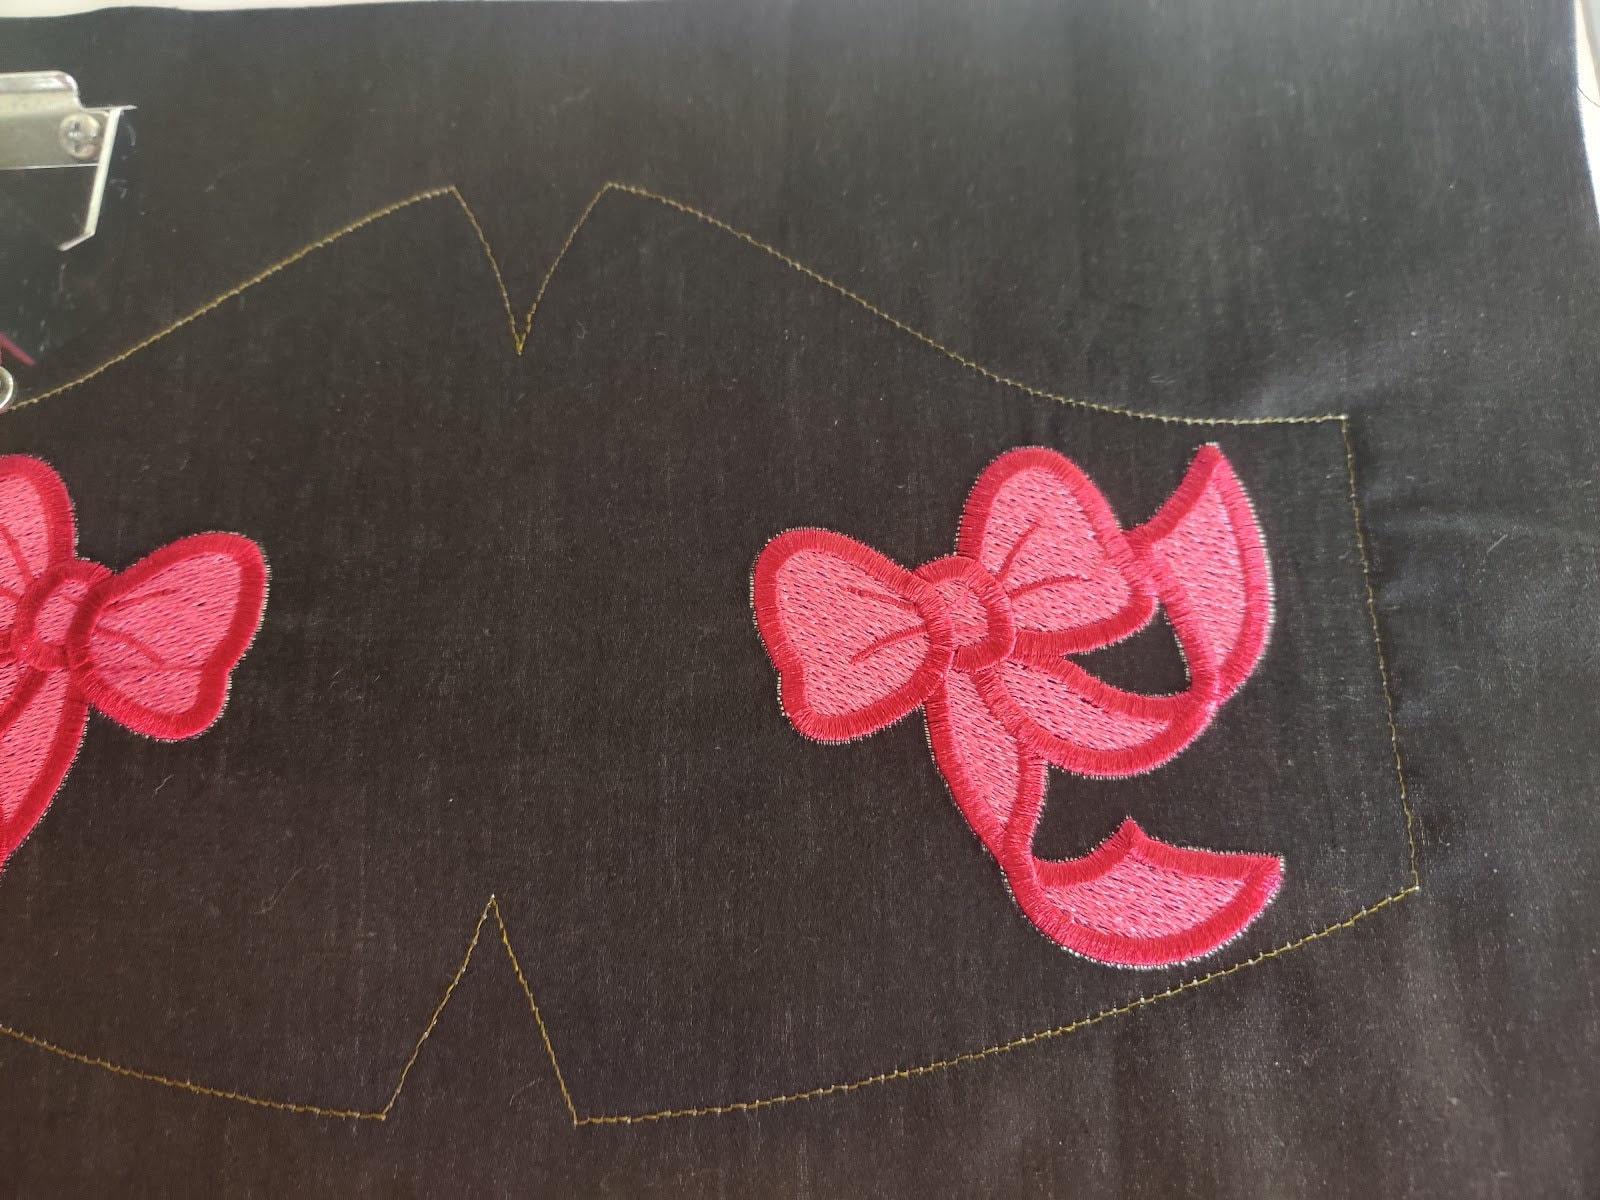
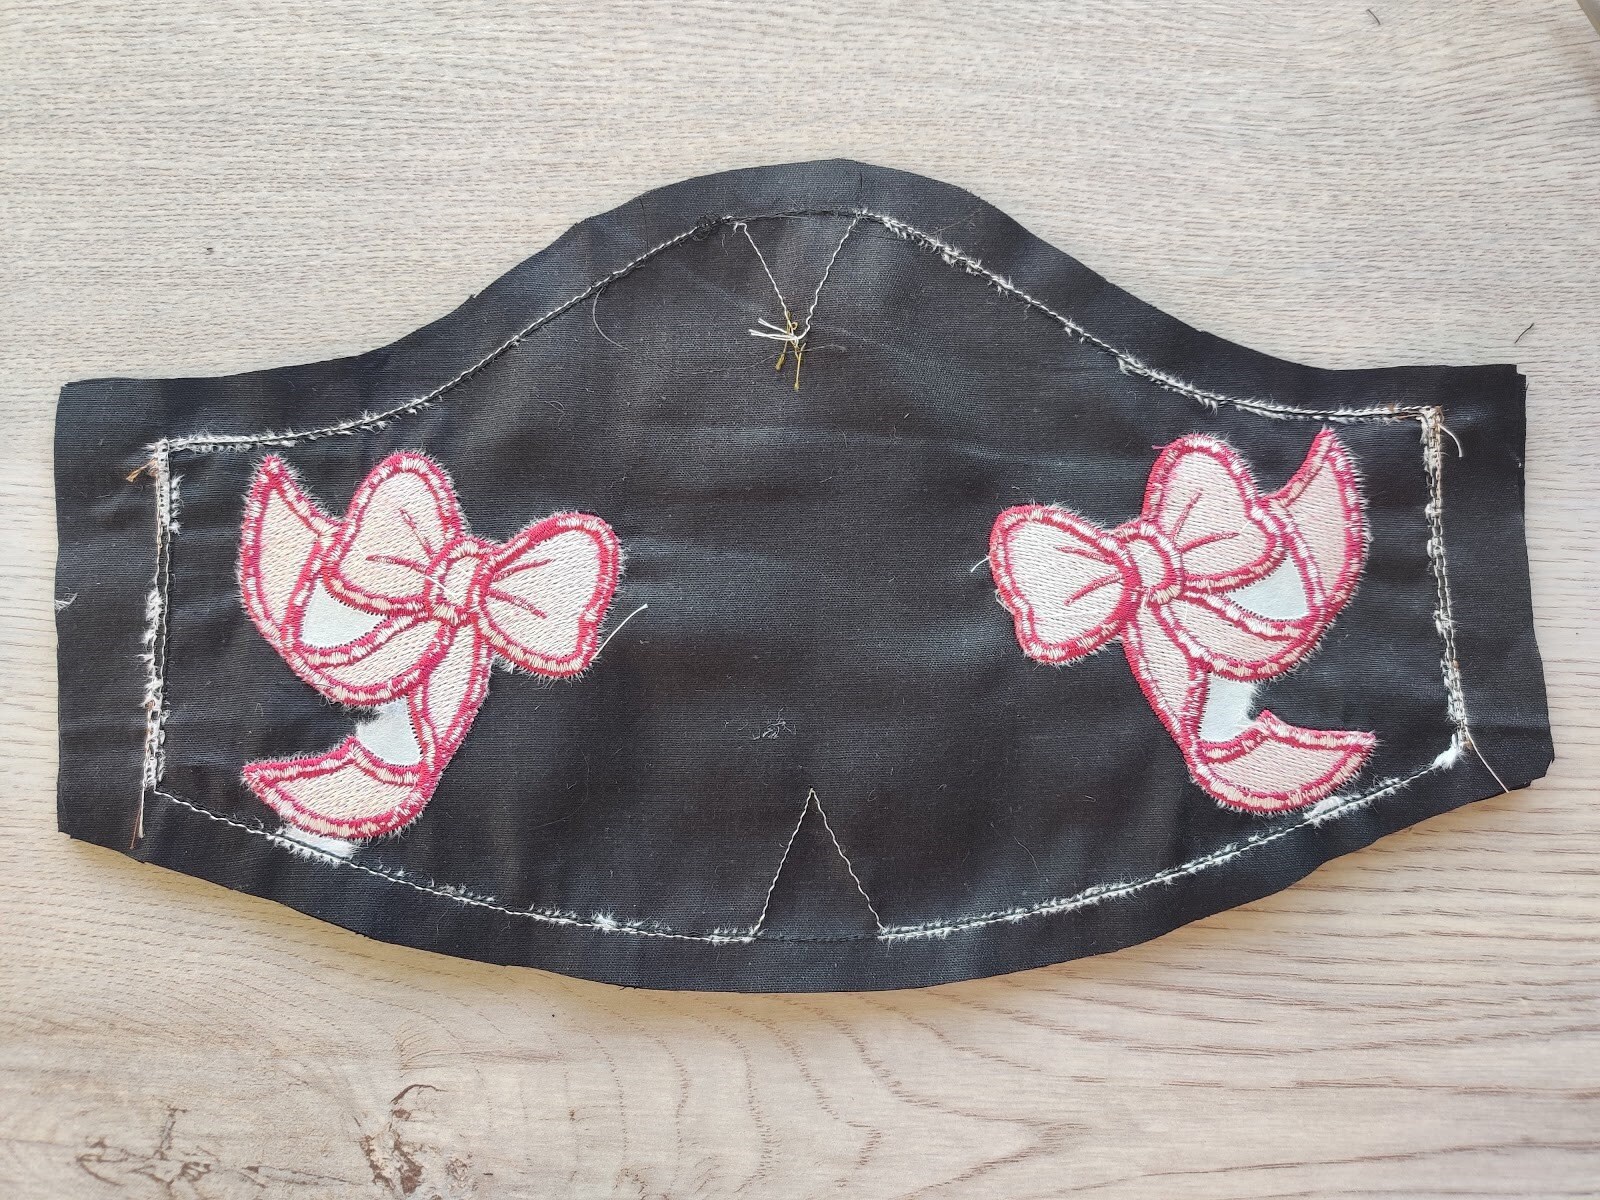
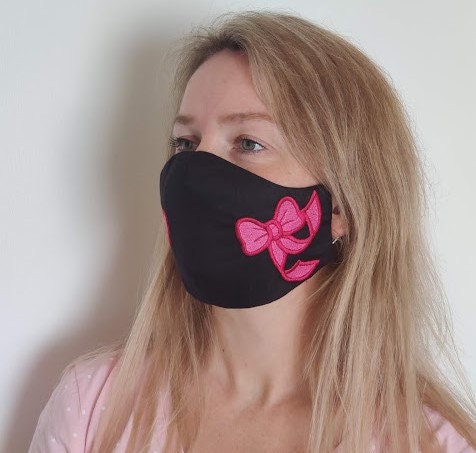
E. Face Mask embroidery design - Pink Bows
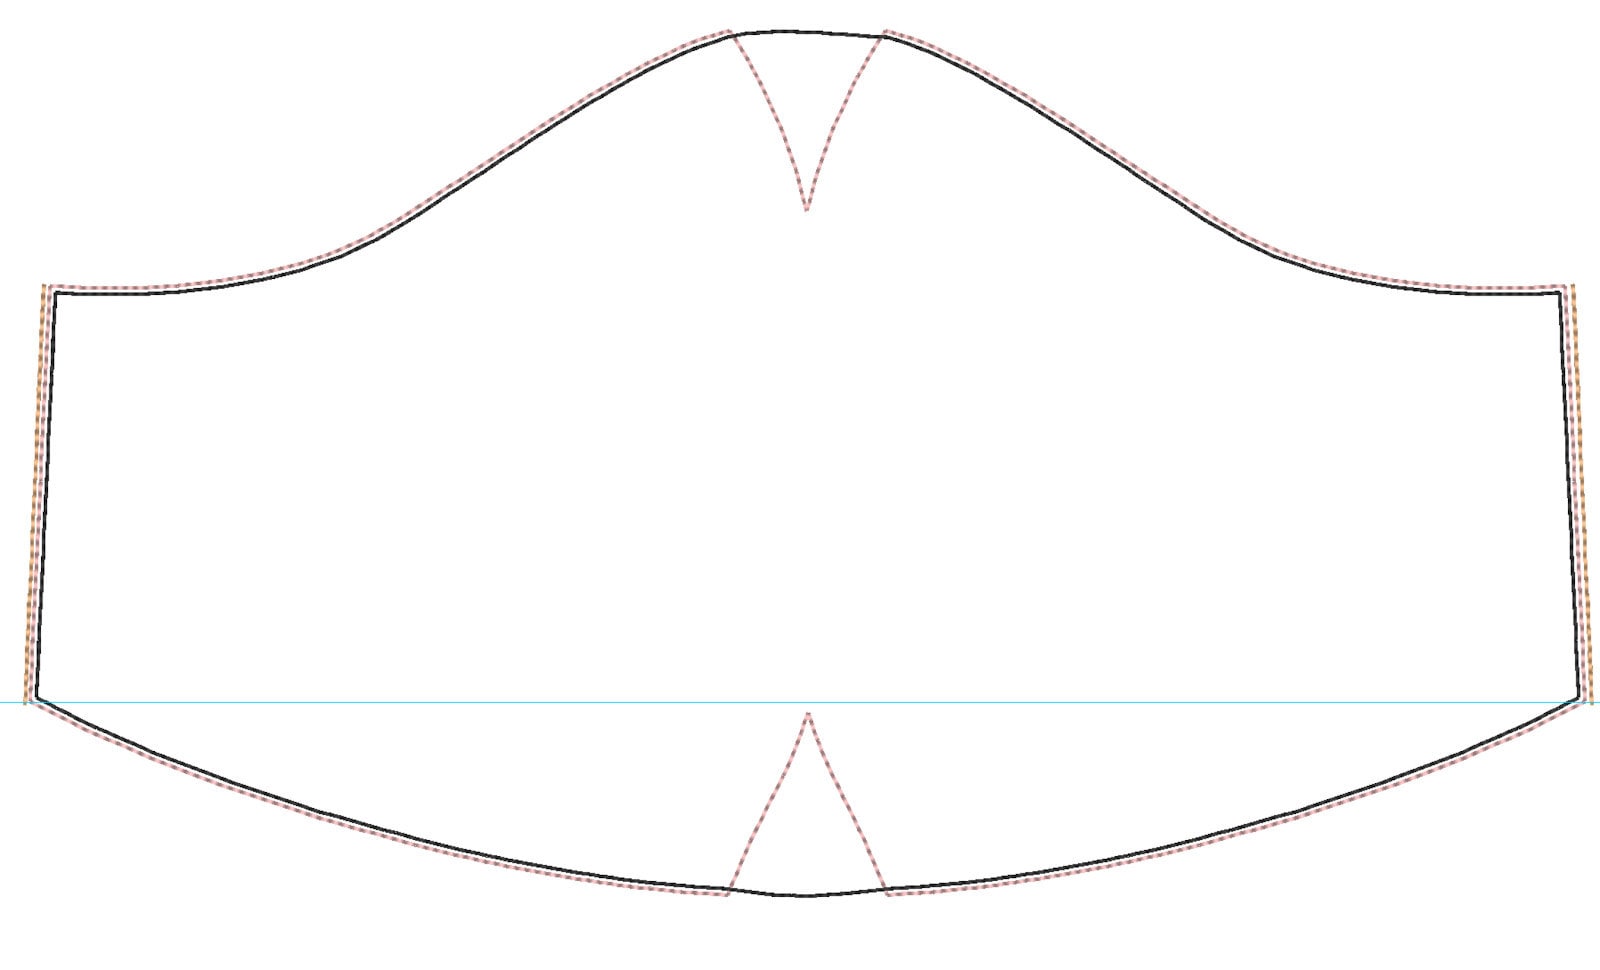
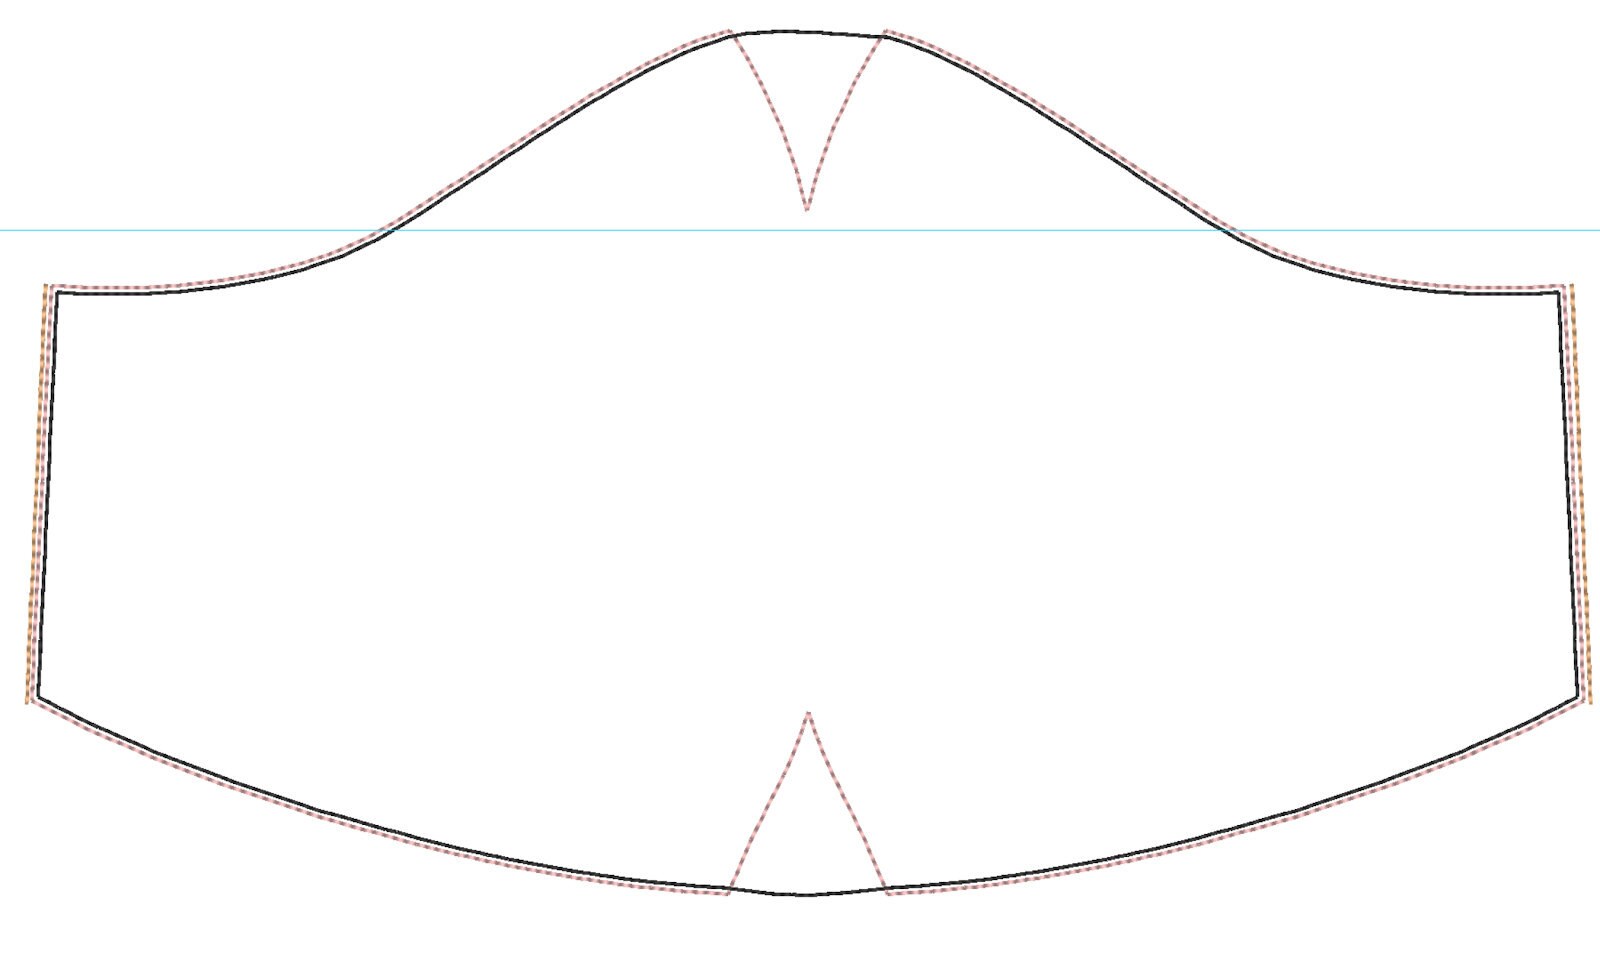
Ready sizes
- Size XS/ Kids 4.6H and 8.9W
- Size S/ Teens 5H and 9.15W
- Size M/ Ladies 5.5H and 9.6W
- Size L/ Men 6H and 11W
- Size XL/ Men 6.5H and 11.5W
Tip: fabric pieces shouldn't cut exact size as marked below, sizes may vary in ½ inches
Fabric cuts
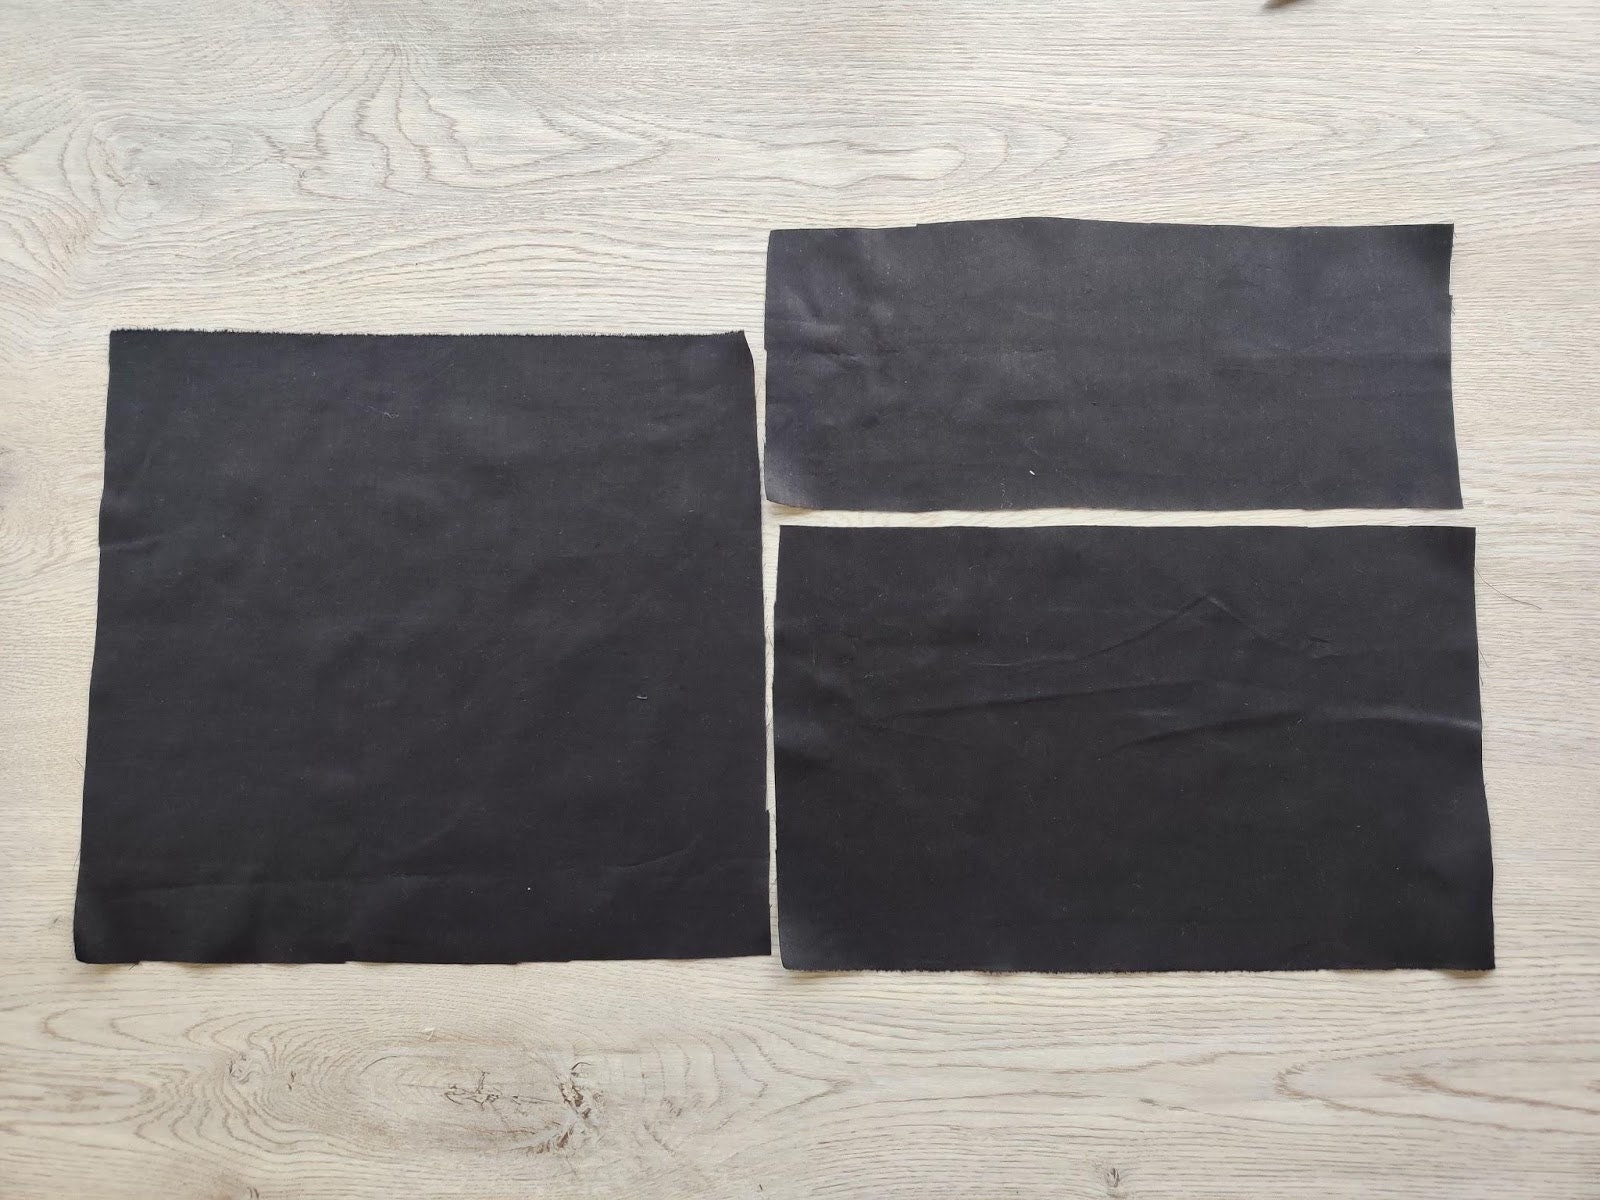
Size XS has 3 following fabric cuts
6 H and 10.5 W front piece
9.5 H and 10.5 W backside
4.7 H and 10.5 W backside lining
Size S has 3 following fabric cuts
6.5 H and 10.75 W front piece
10.4 H and 10.75 W backside
5.2 H and 10.75 W backside lining
Size M has 3 following fabric cuts
8 H and 12 W front piece
13.5 H and 12 W backside
6.7 H and 12 W backside lining
Size L has 3 following fabric cuts
7.5 H and 12.9 W front piece
12.4 H and 12.9 W backside
6.2 H and 12.9 W backside lining
Size XL has 3 following fabric cuts
7.5 H and 12.9 W front piece
12.4 H and 12.9 W backside
6.2 H and 12.9 W backside lining
Elastic may be made around the head or over the ears.
- XS elastic around the head:
the head 7 upper and 6 bottom
or XS elastic over the ears: 2 cuts by 4.5
- S elastic around the head:
the head 7.5 upper and 6.5 bottom
or S elastic over the ears: 2 cuts by 5
- M elastic around the head:
the head 9.5 upper and 8.5 bottom
or M elastic over the ears: 2 cuts by 6
- L elastic around the head:
the head 10.5 upper and 9 bottom
or L elastic over the ears: 2 cuts by 6.5
- XL elastic around the head:
the head 11 upper and 9.5 bottom
or XL elastic over the ears: 2 cuts by 7
Also, you need tear away or wash away stabilizer, scissors, tape and pins.
Embroidery
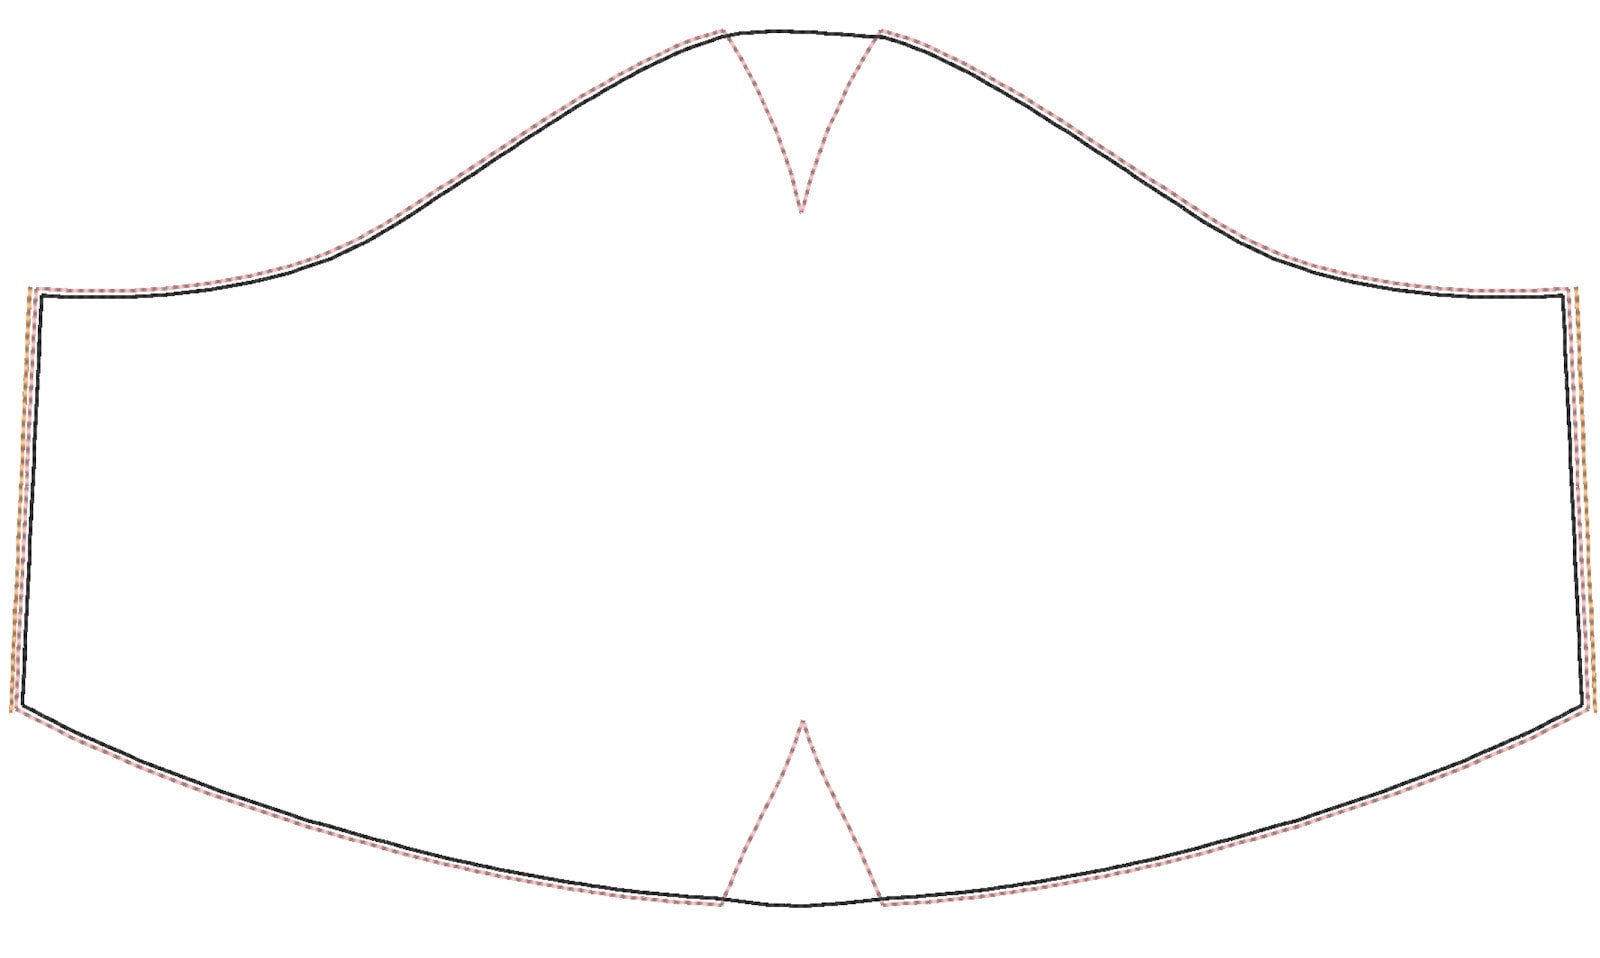
Embroidery design has 3 main colors steps that build the face mask.
- The entire mask dieline
- Elastics tack down
- The entire mask finish outline
Project Colors changes may vary depending of the decorations.
Decorations are additional color steps, please find a separate color chart for the exact purchased mask to follow them.
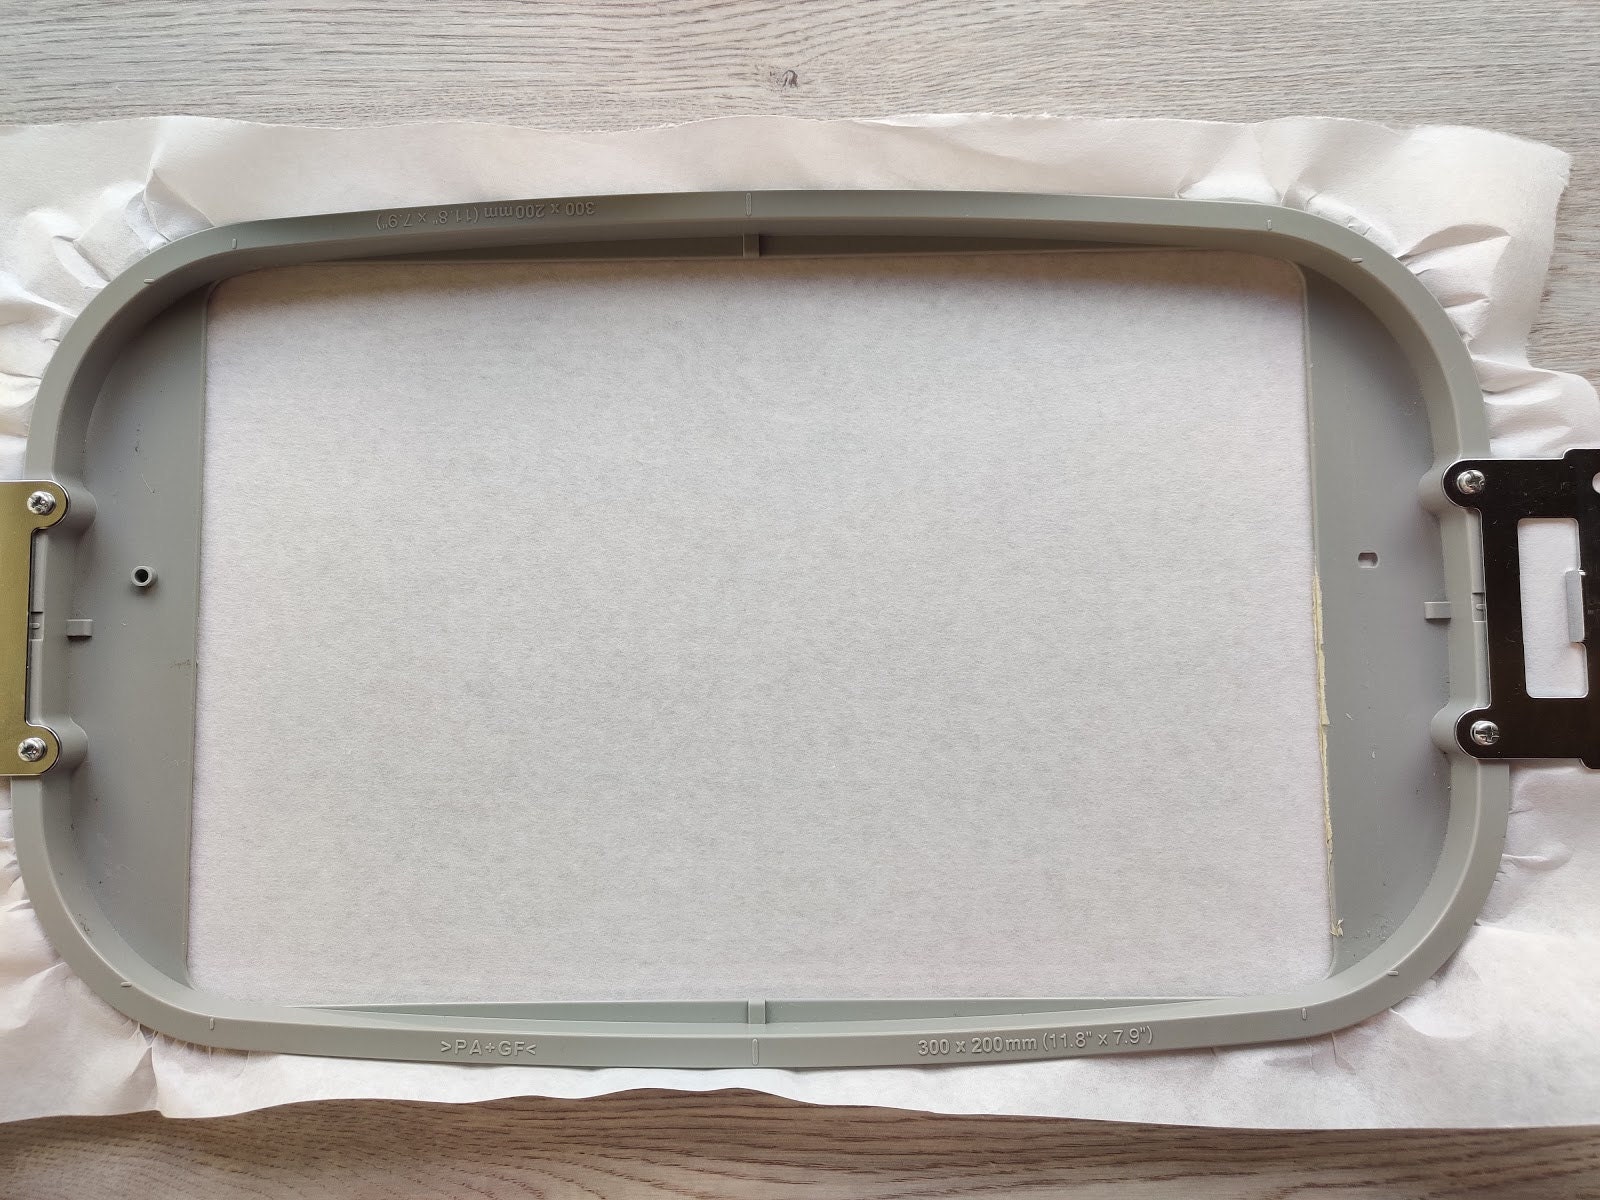
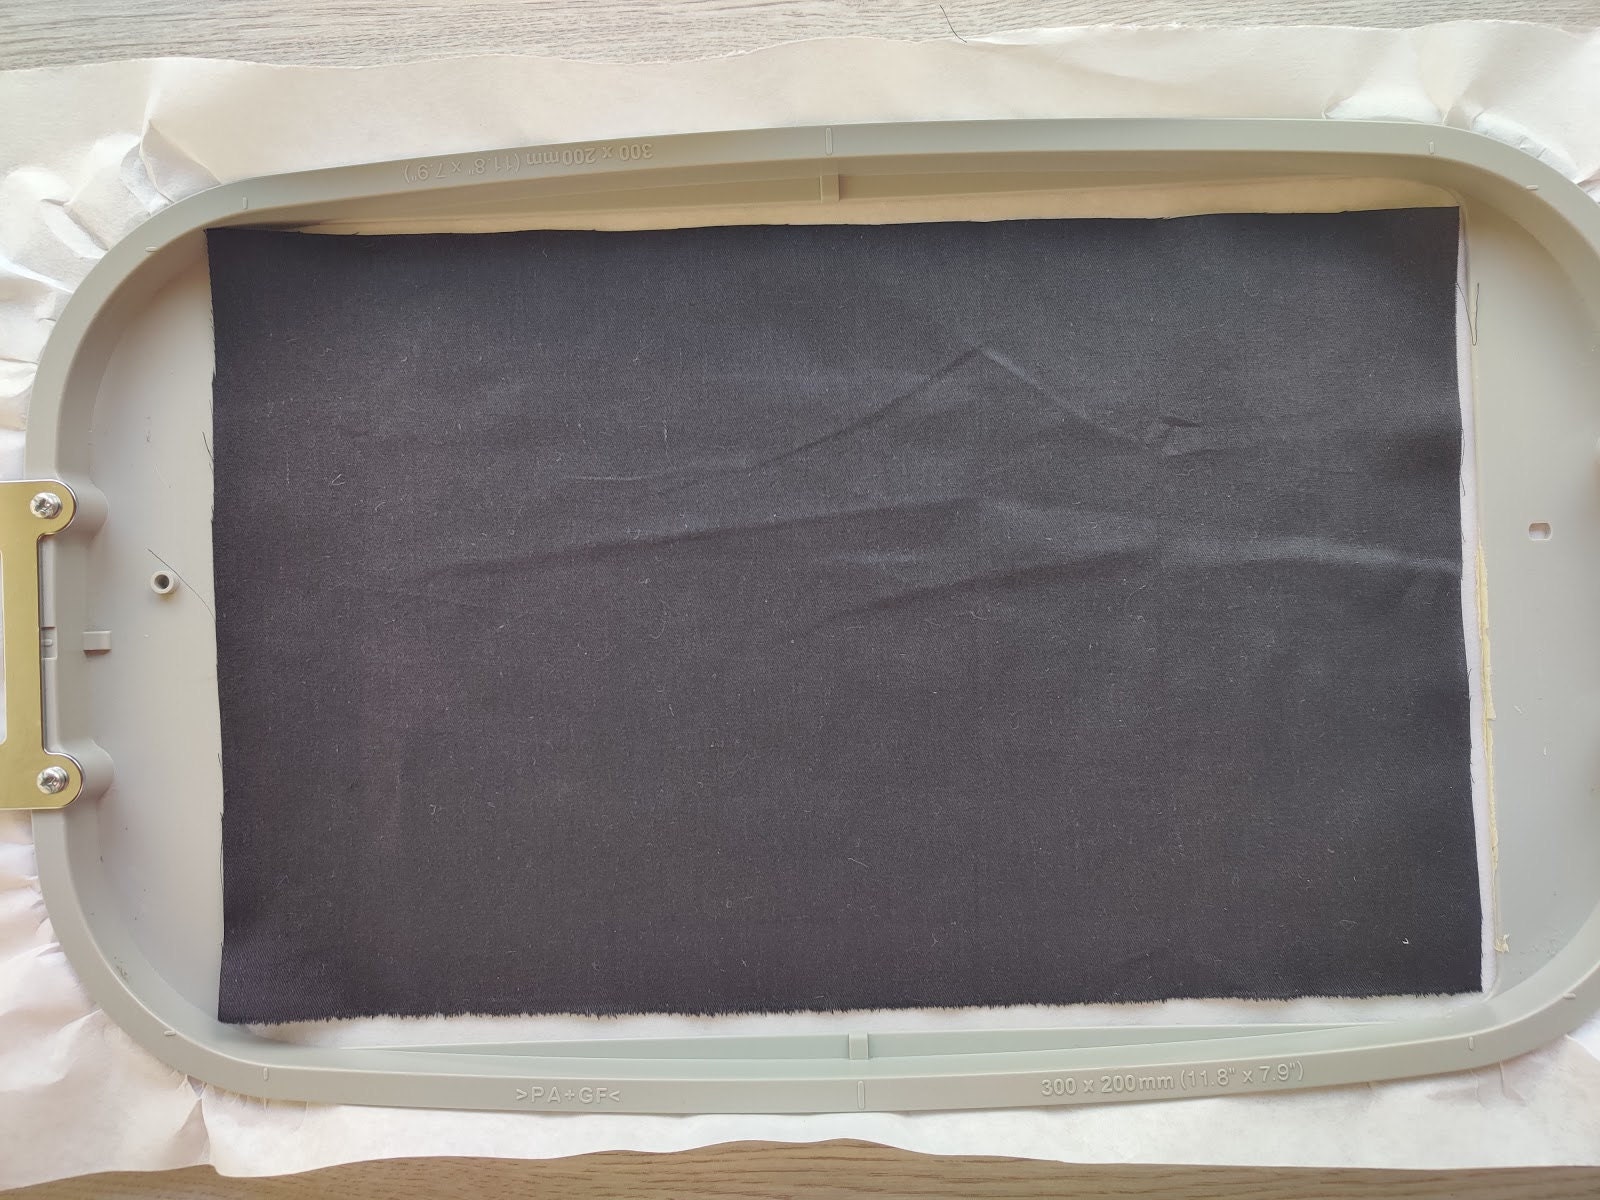
Hoop tear-away or water soluble stabilizer and lay the piece of fabric in the center.
Embroider the mask outline NR 1 to tack down the piece of fabric so it stays flat and nice while stitching decoration.
Tip: use the same color as the mask fabric to prevent showing up.
Finish any decoration on the mask. In any project just pause the machine before the last two colors.
Pause your project. Do not unhoop it! It is time to add elastics and lining.
Elastics, tape them in corners, make sure it will stay inside the mask while stitching.
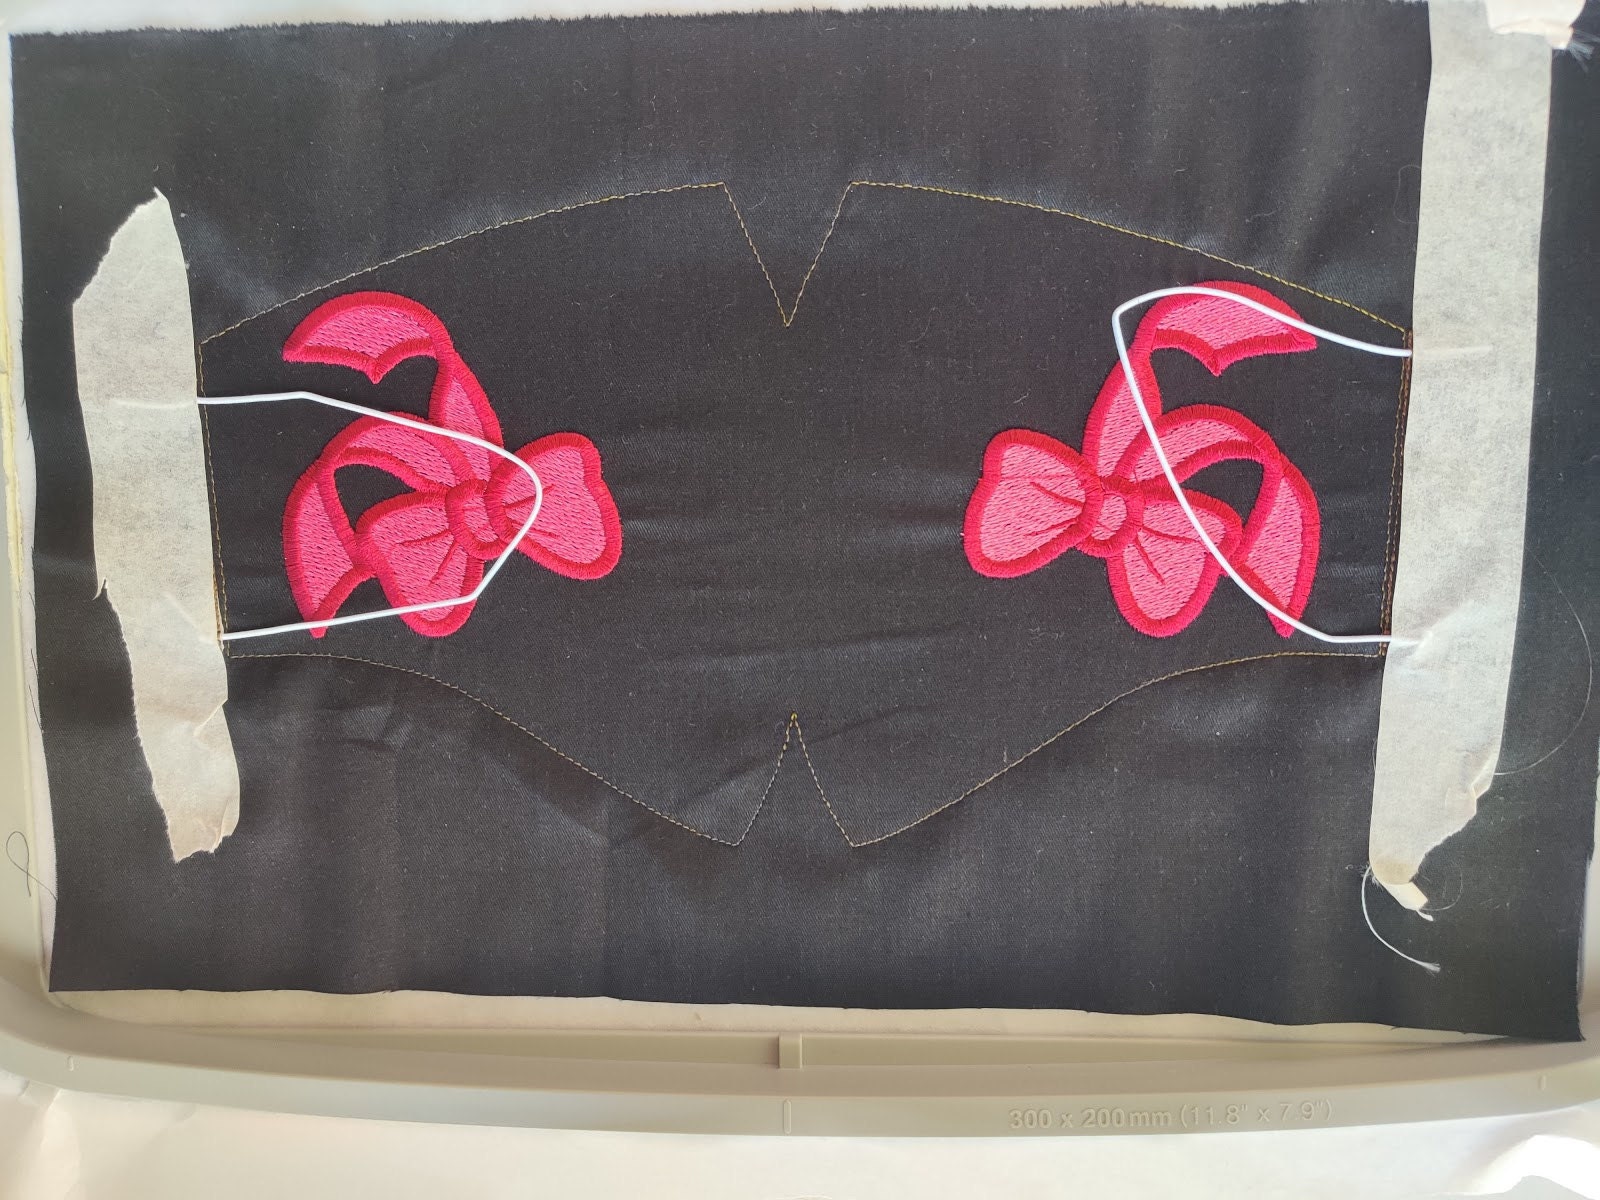
Stitch the NR 2 color change of the embroidery design to tack down elastics.
Lining
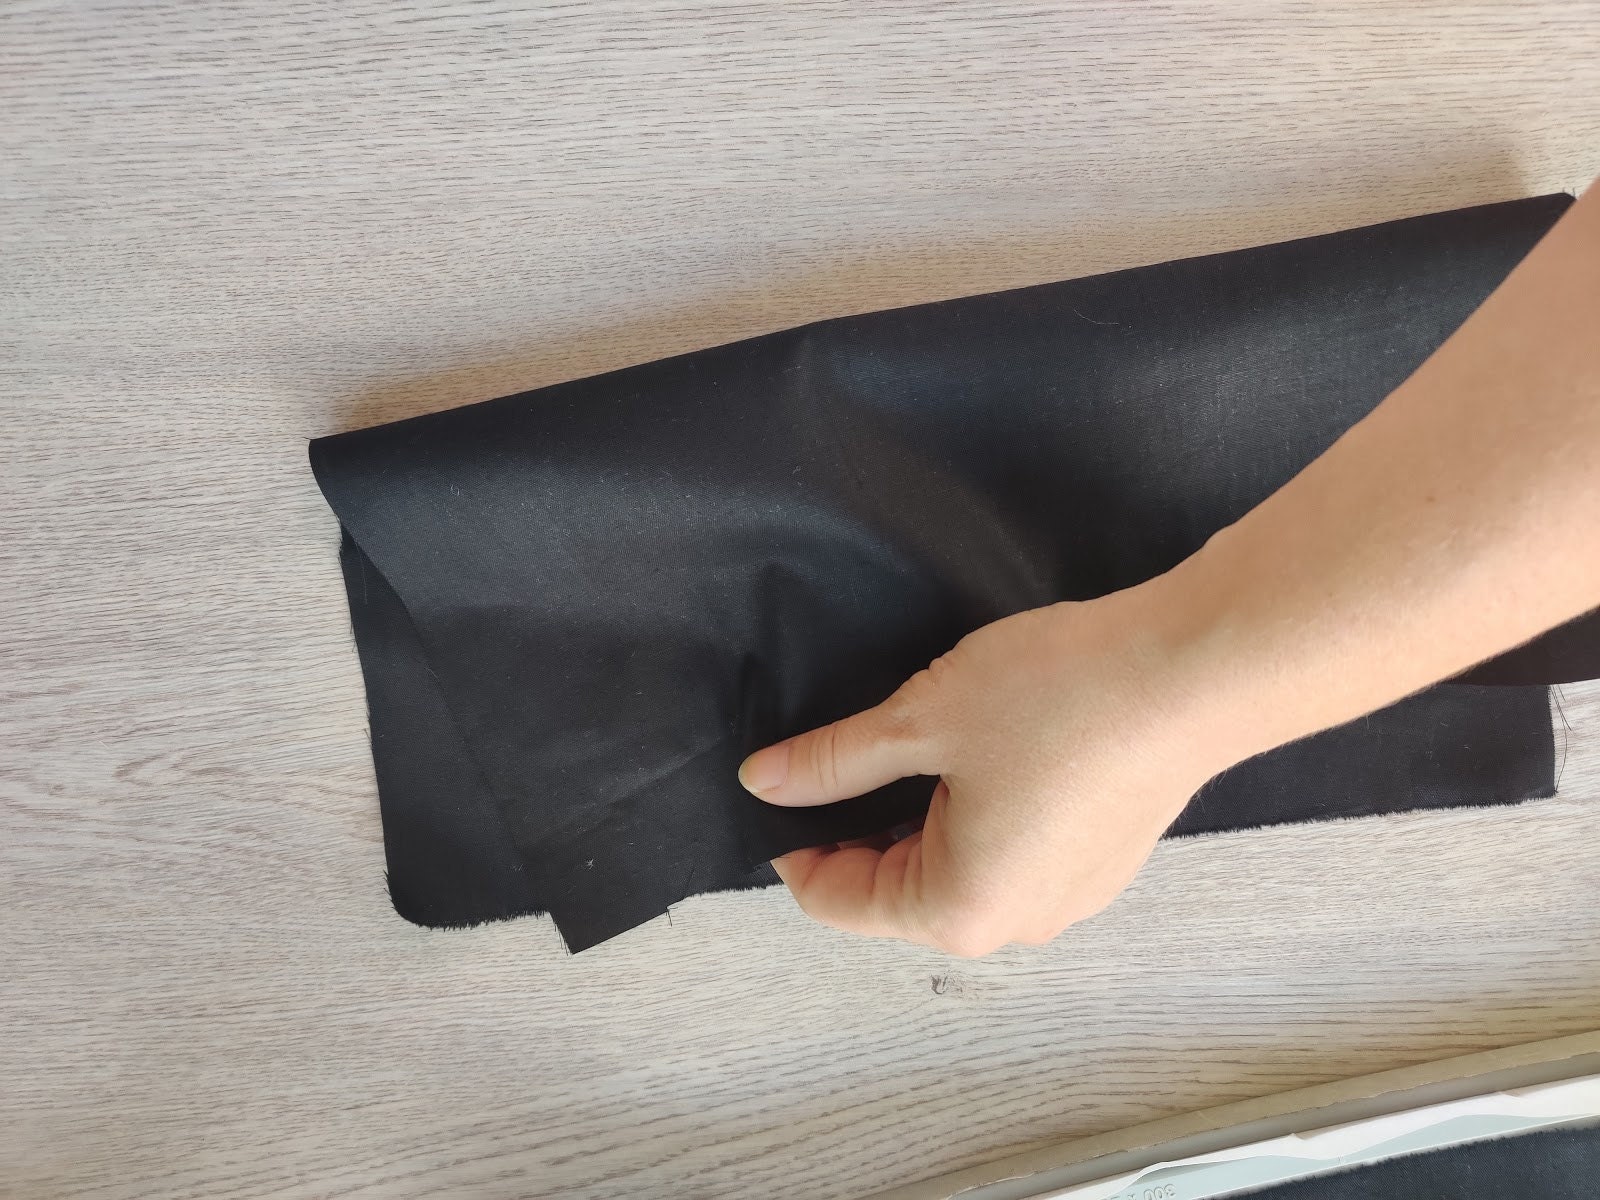
Take the bigger lining piece and fold it in half horizontally left sides together, so the right side is outside.
And lay the folded fabric in half open folded edge against the guideline shown below.
So the folded edge is a little above the bottom dart point.

And use the smaller lining piece, lay it against the bottom, and the upper cut is a little below the upper dart point.
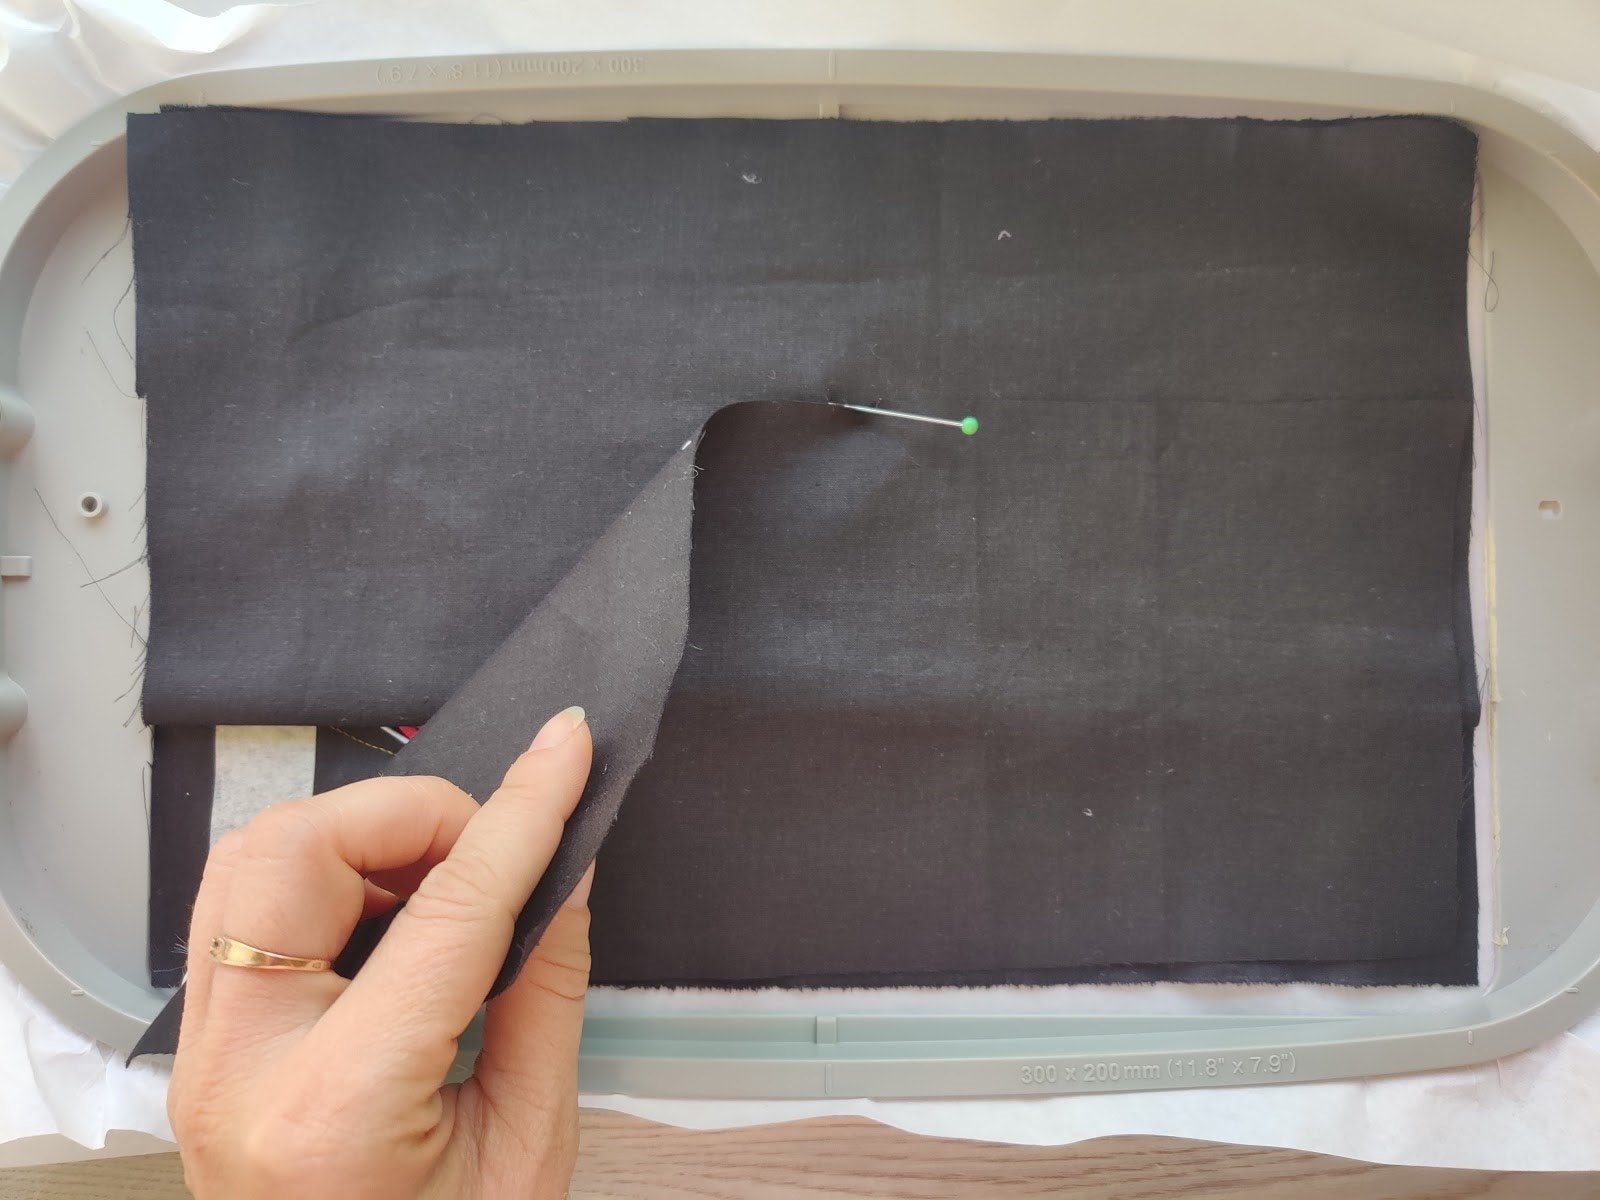
Since you can't see the upper dart point and where it finishes, use the pin to track it.
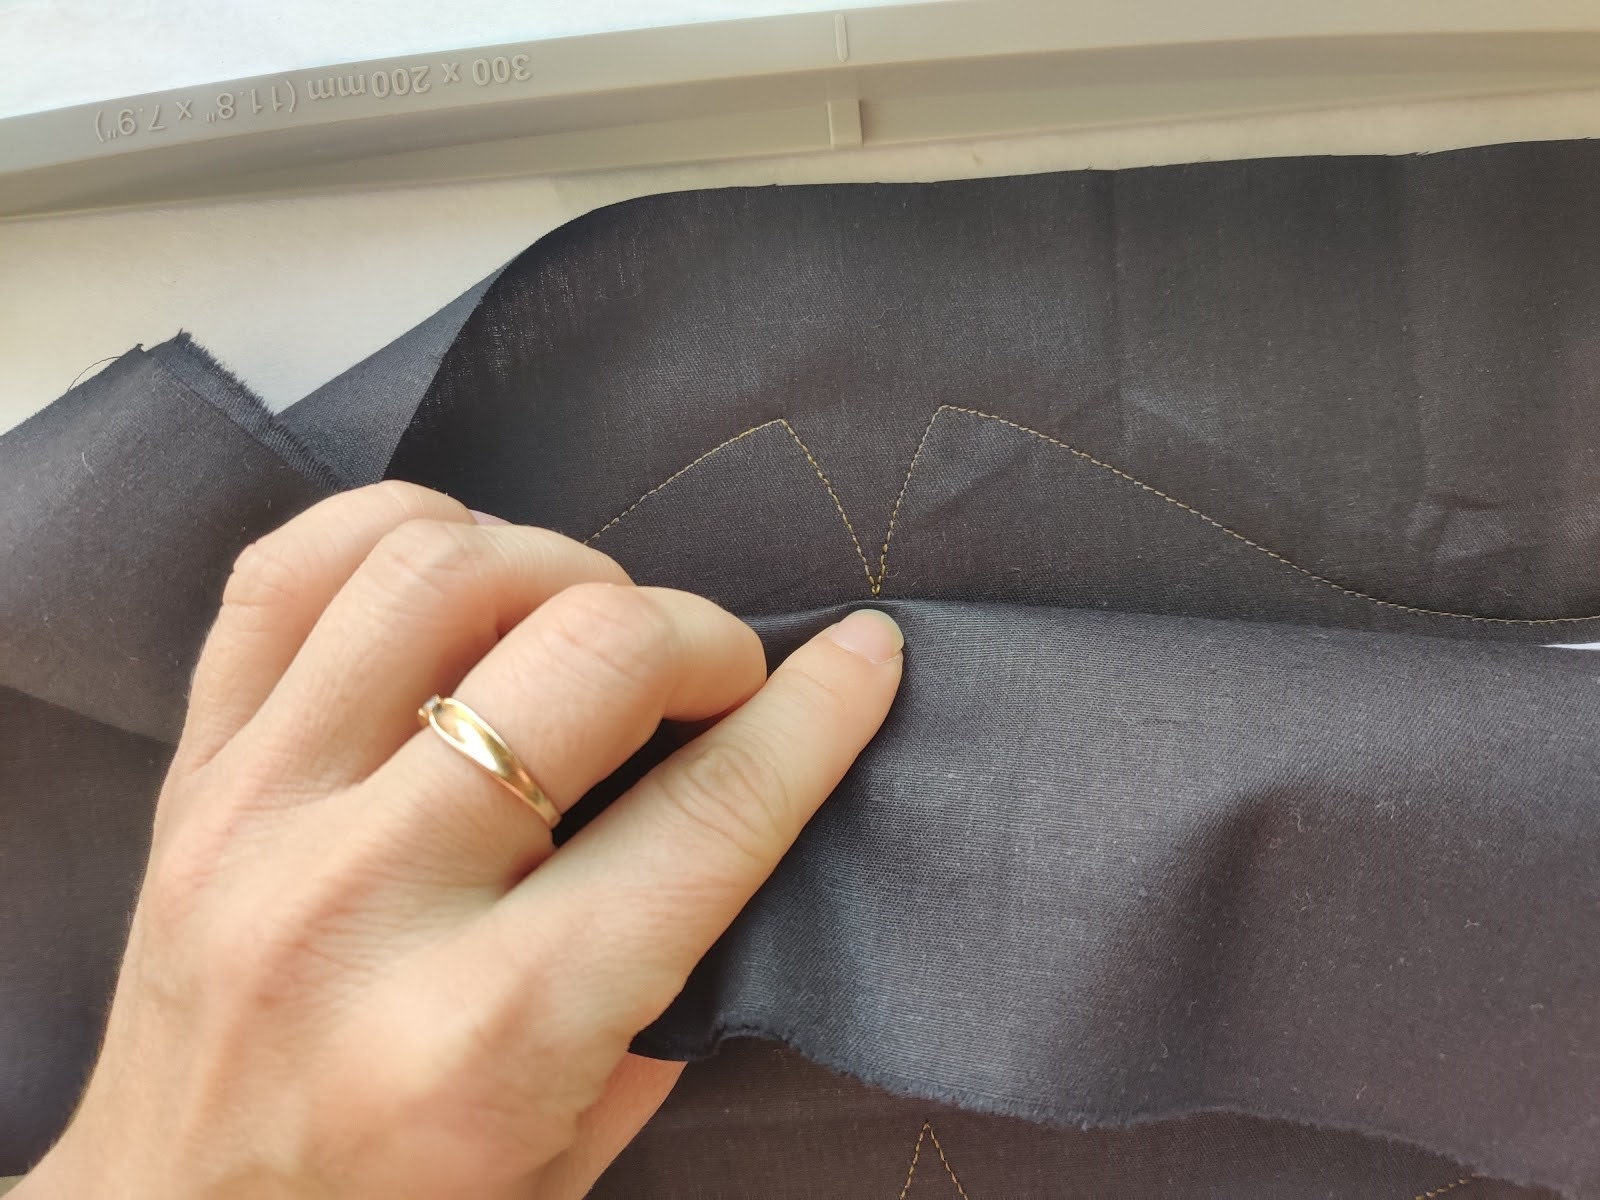
Find dart below the previous laid lining piece, carefully fold it and pin the dart point.
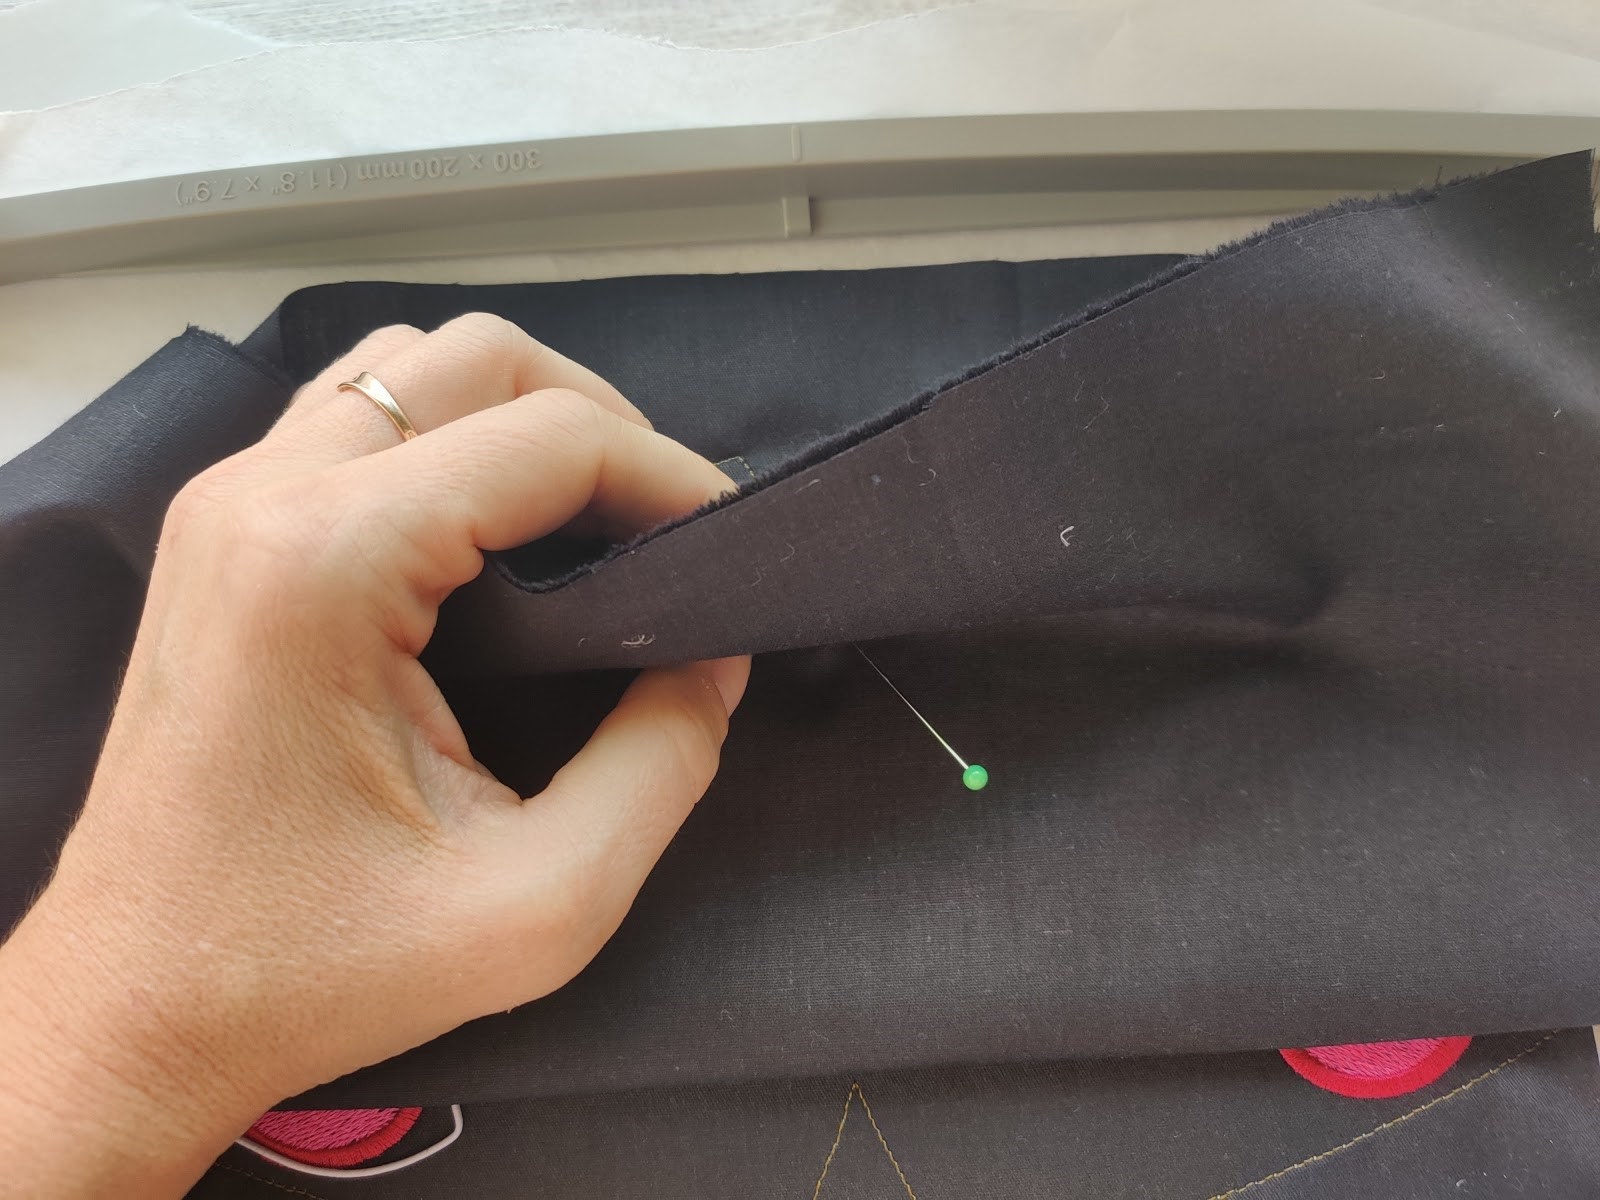
So lay the smaller lining piece against the bottom, and the upper cut is a little below the upper dart point AND RIGHT SIDE DOWN.
Tip: fabric pieces shouldn't be laid in exact place, position may vary in ½ inches.
Fix with tape or pins to make sure the fabric stays nice and flat and stitch last outline seam.
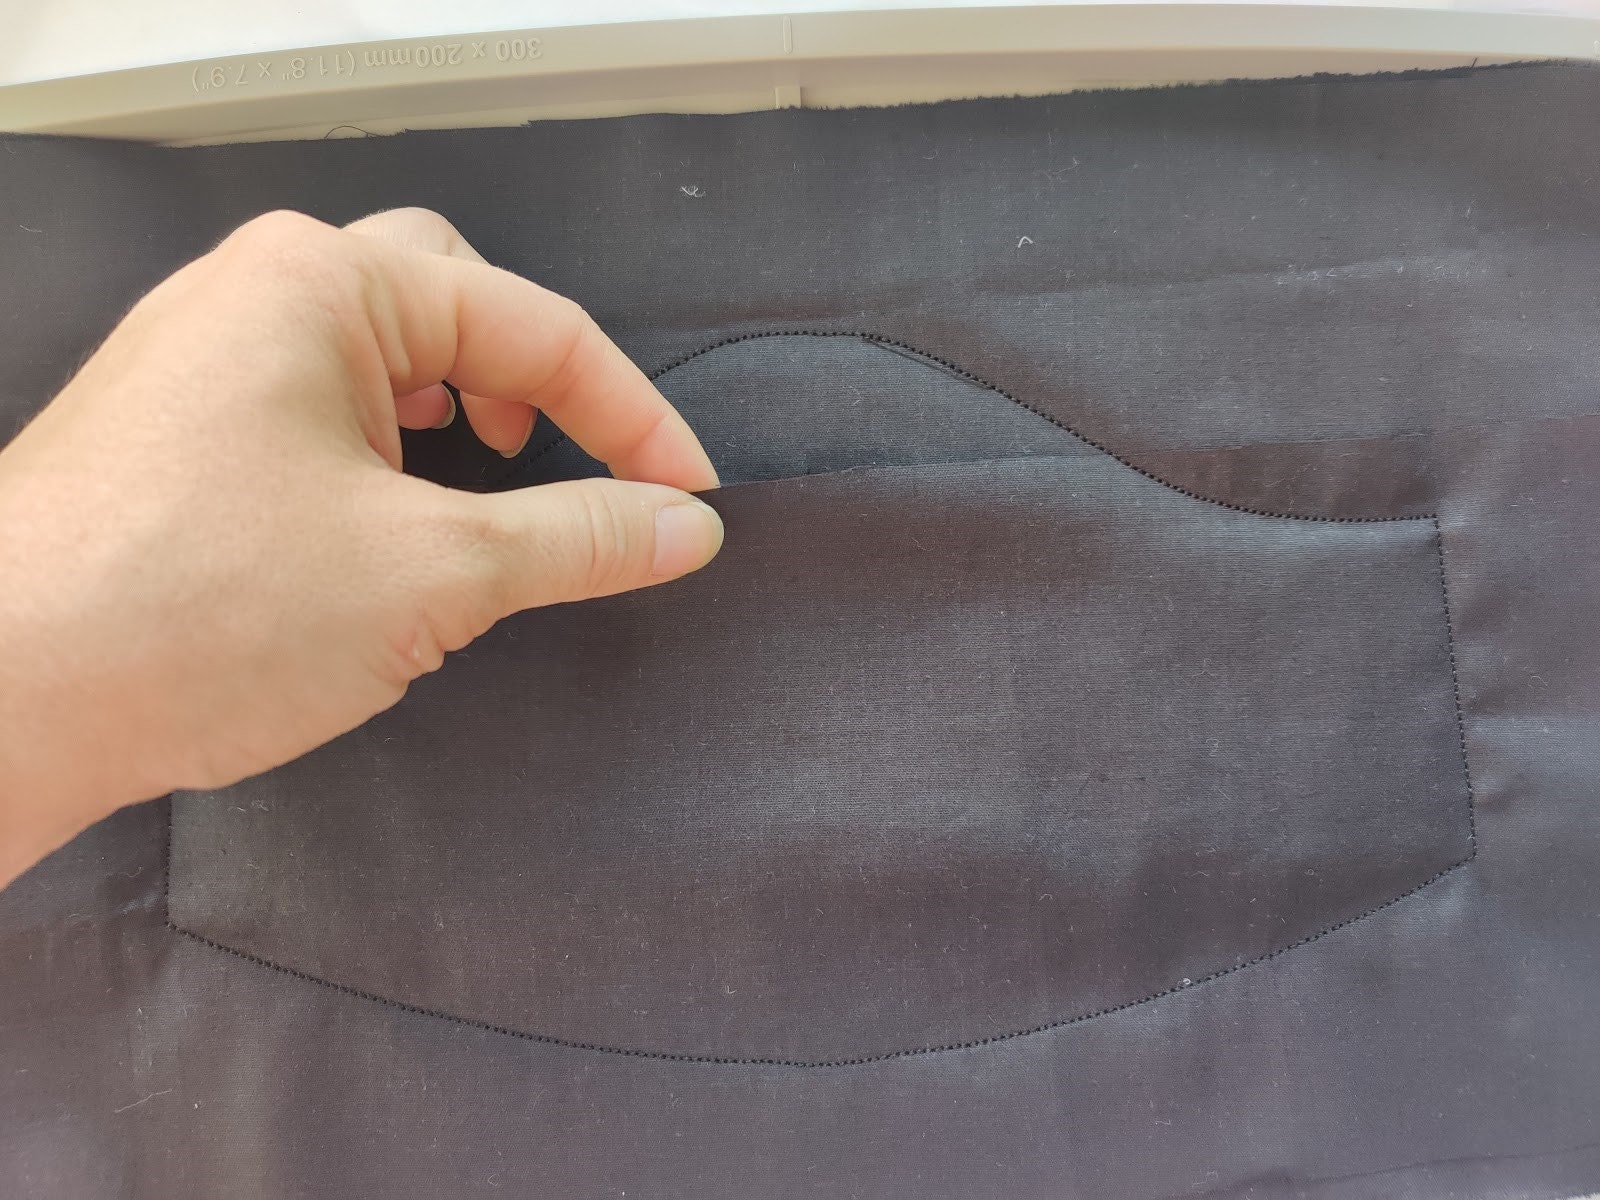
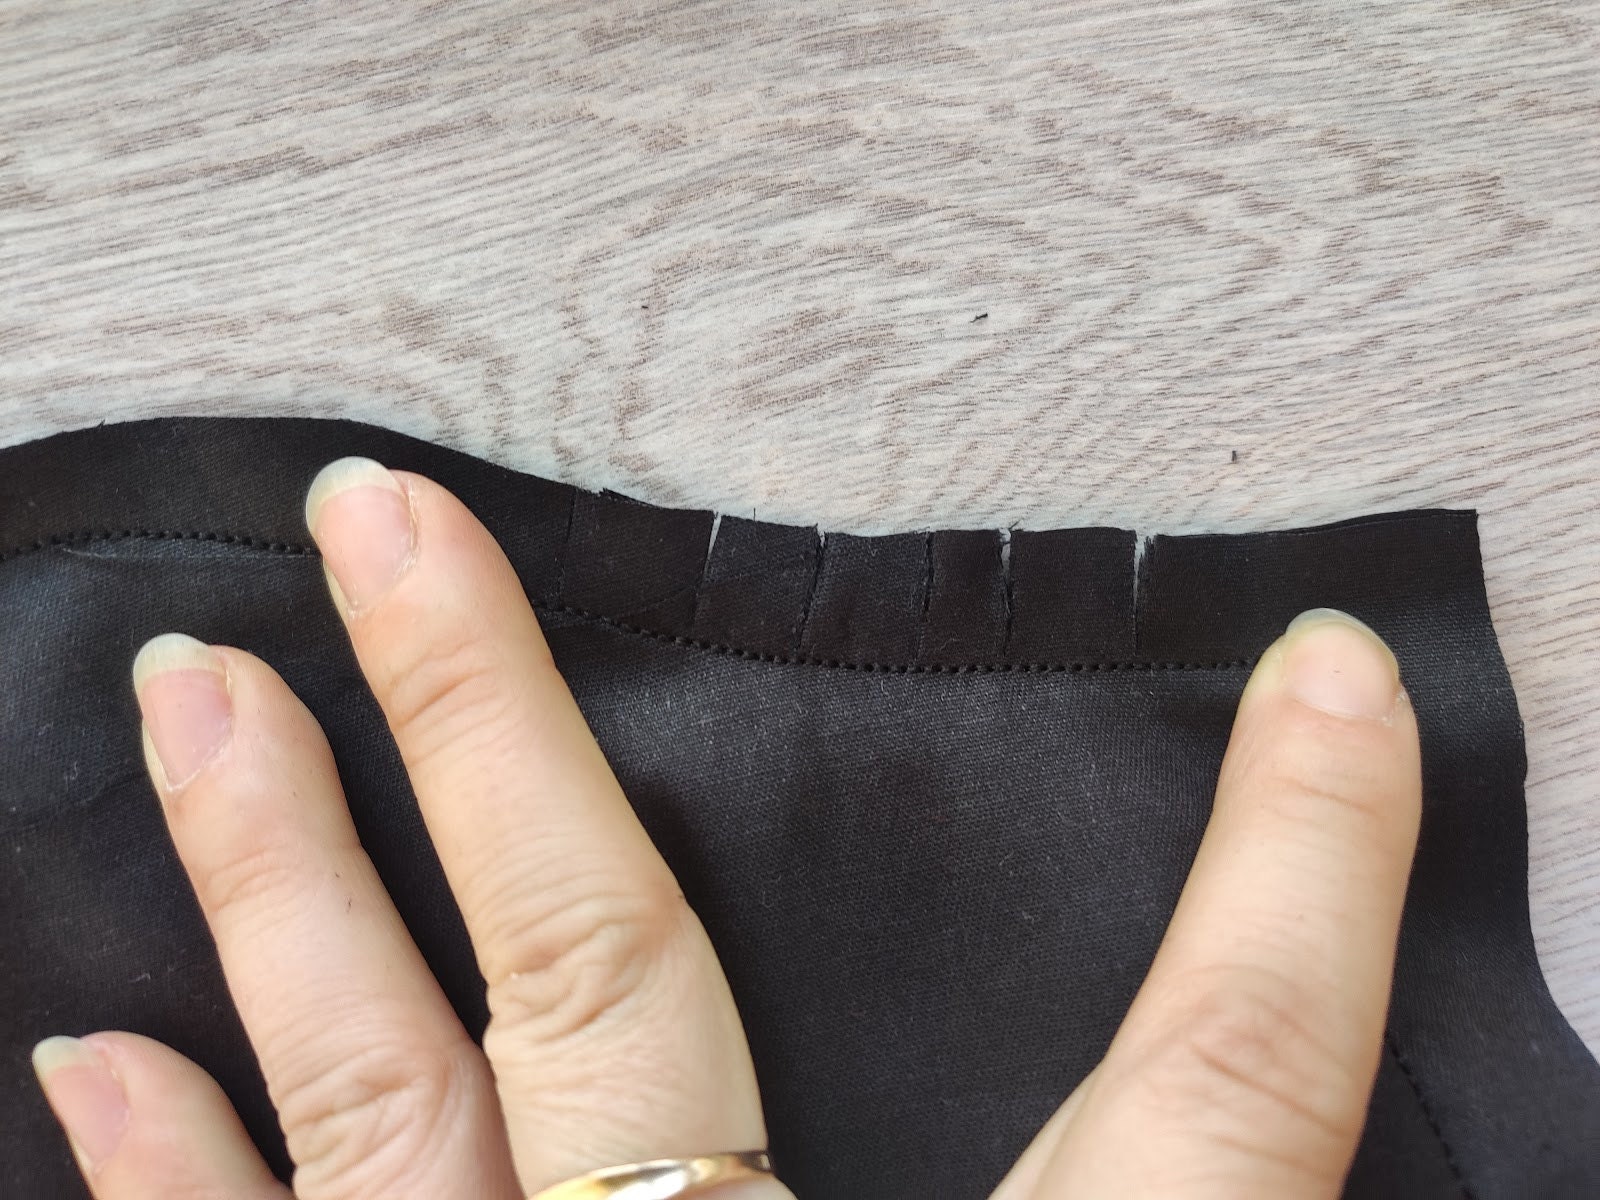
Unhoop your project, cut out the shape along the guideline, seam allowances approx ¼ inch, on sides may be more and gently tear away the excess stabilizer.
Clip into the seam allowances along the curves. Make cuts as close as possible to the seam.
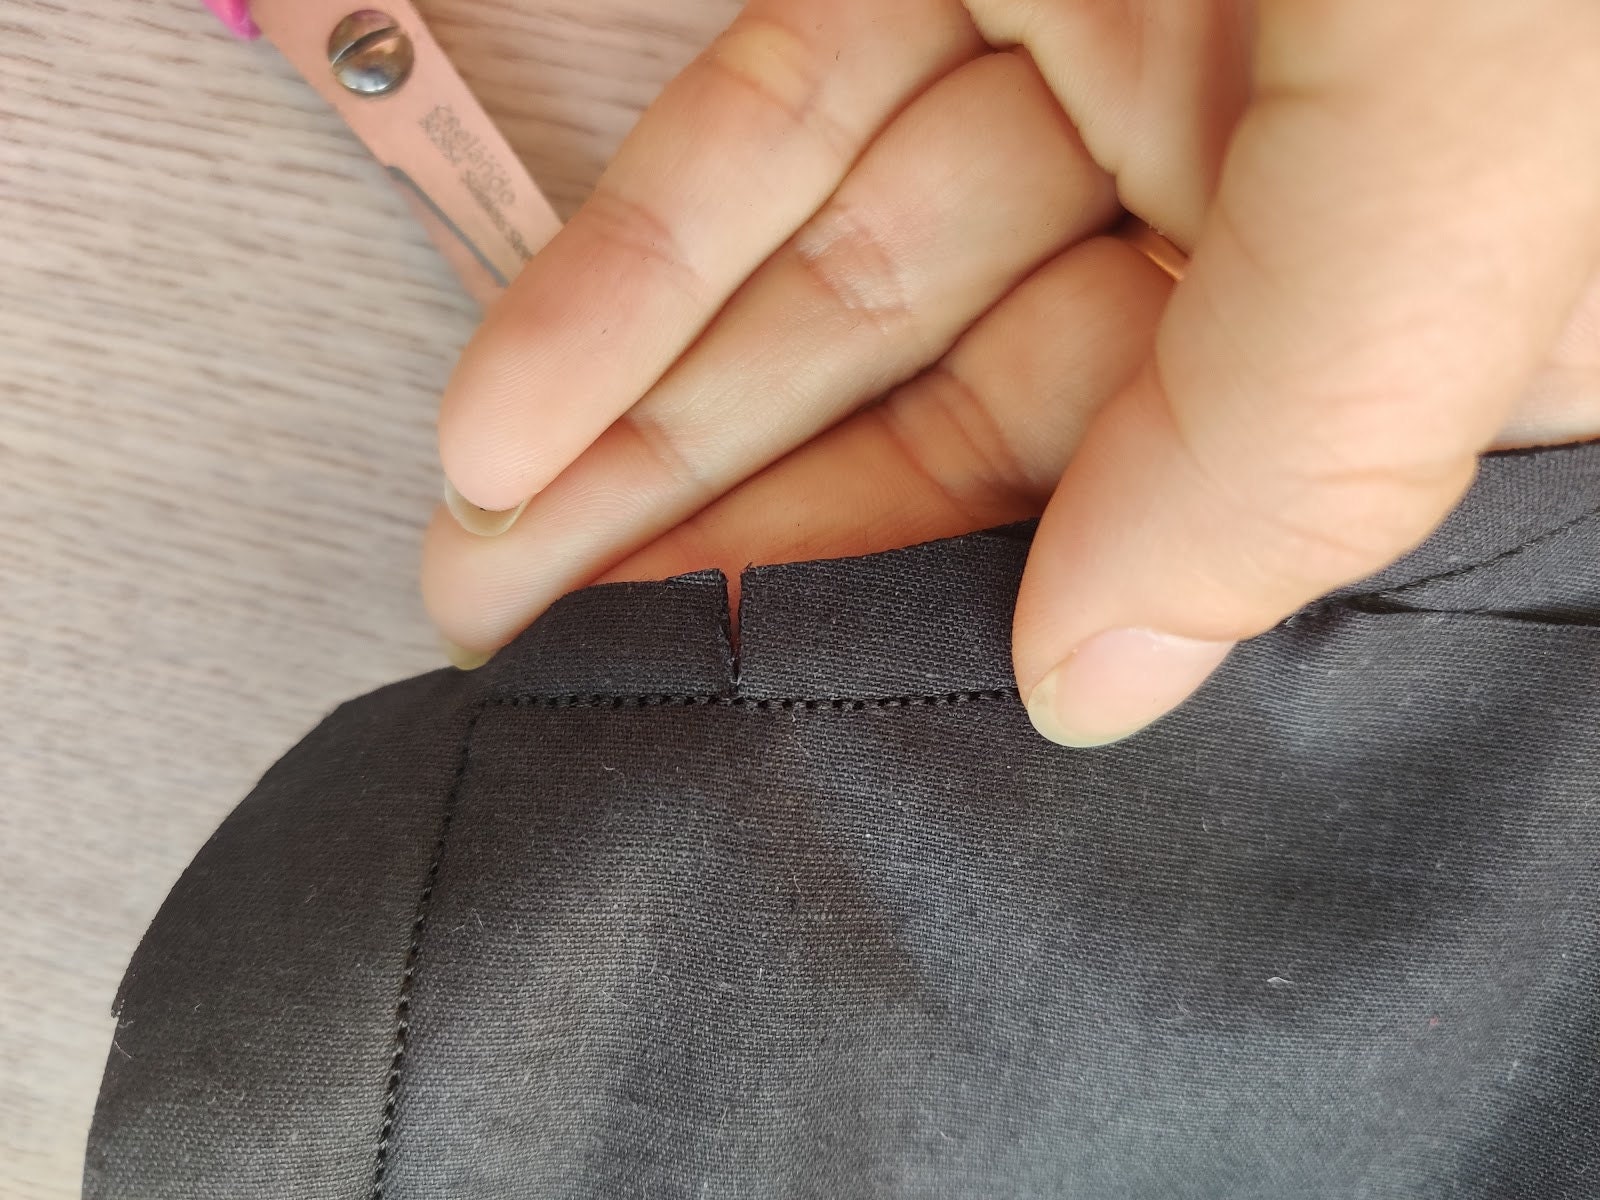
Be careful do not cut the seam!
Turn right side by two steps, first via above below, it's only you will see.
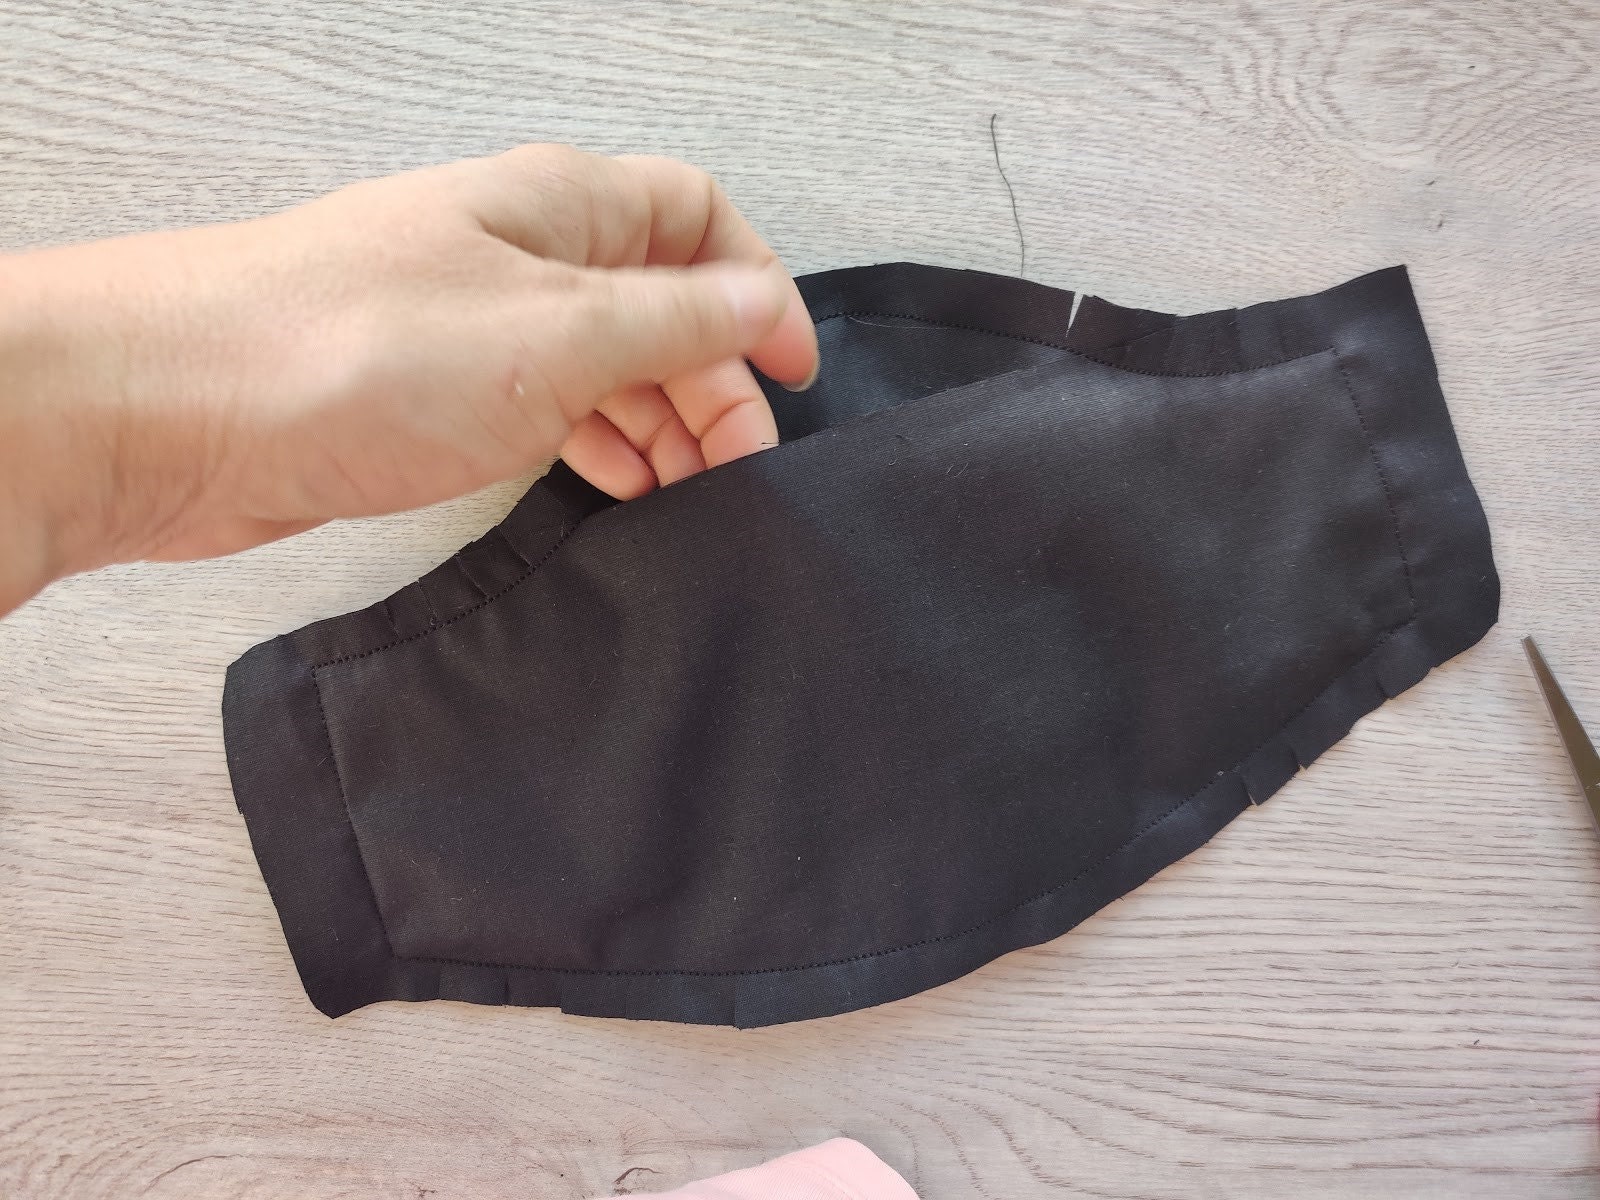
Then via the pocket turn the mask completely right side.
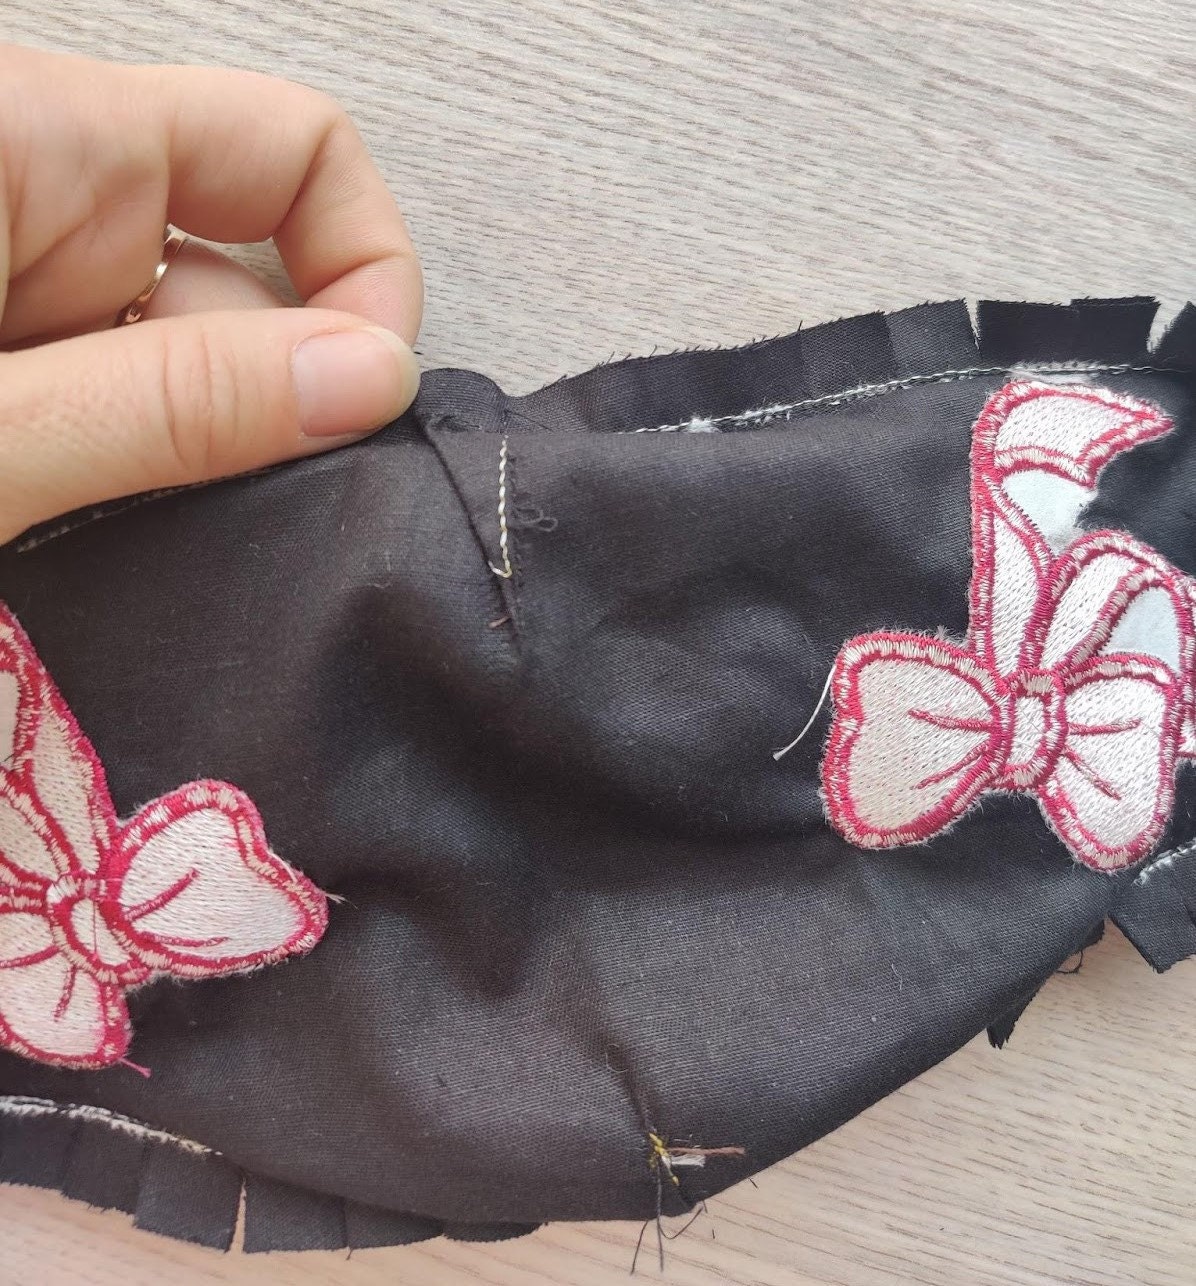
As you can see the darts are not sewn yet, they should be sewn on a regular sewing machine or by hand.

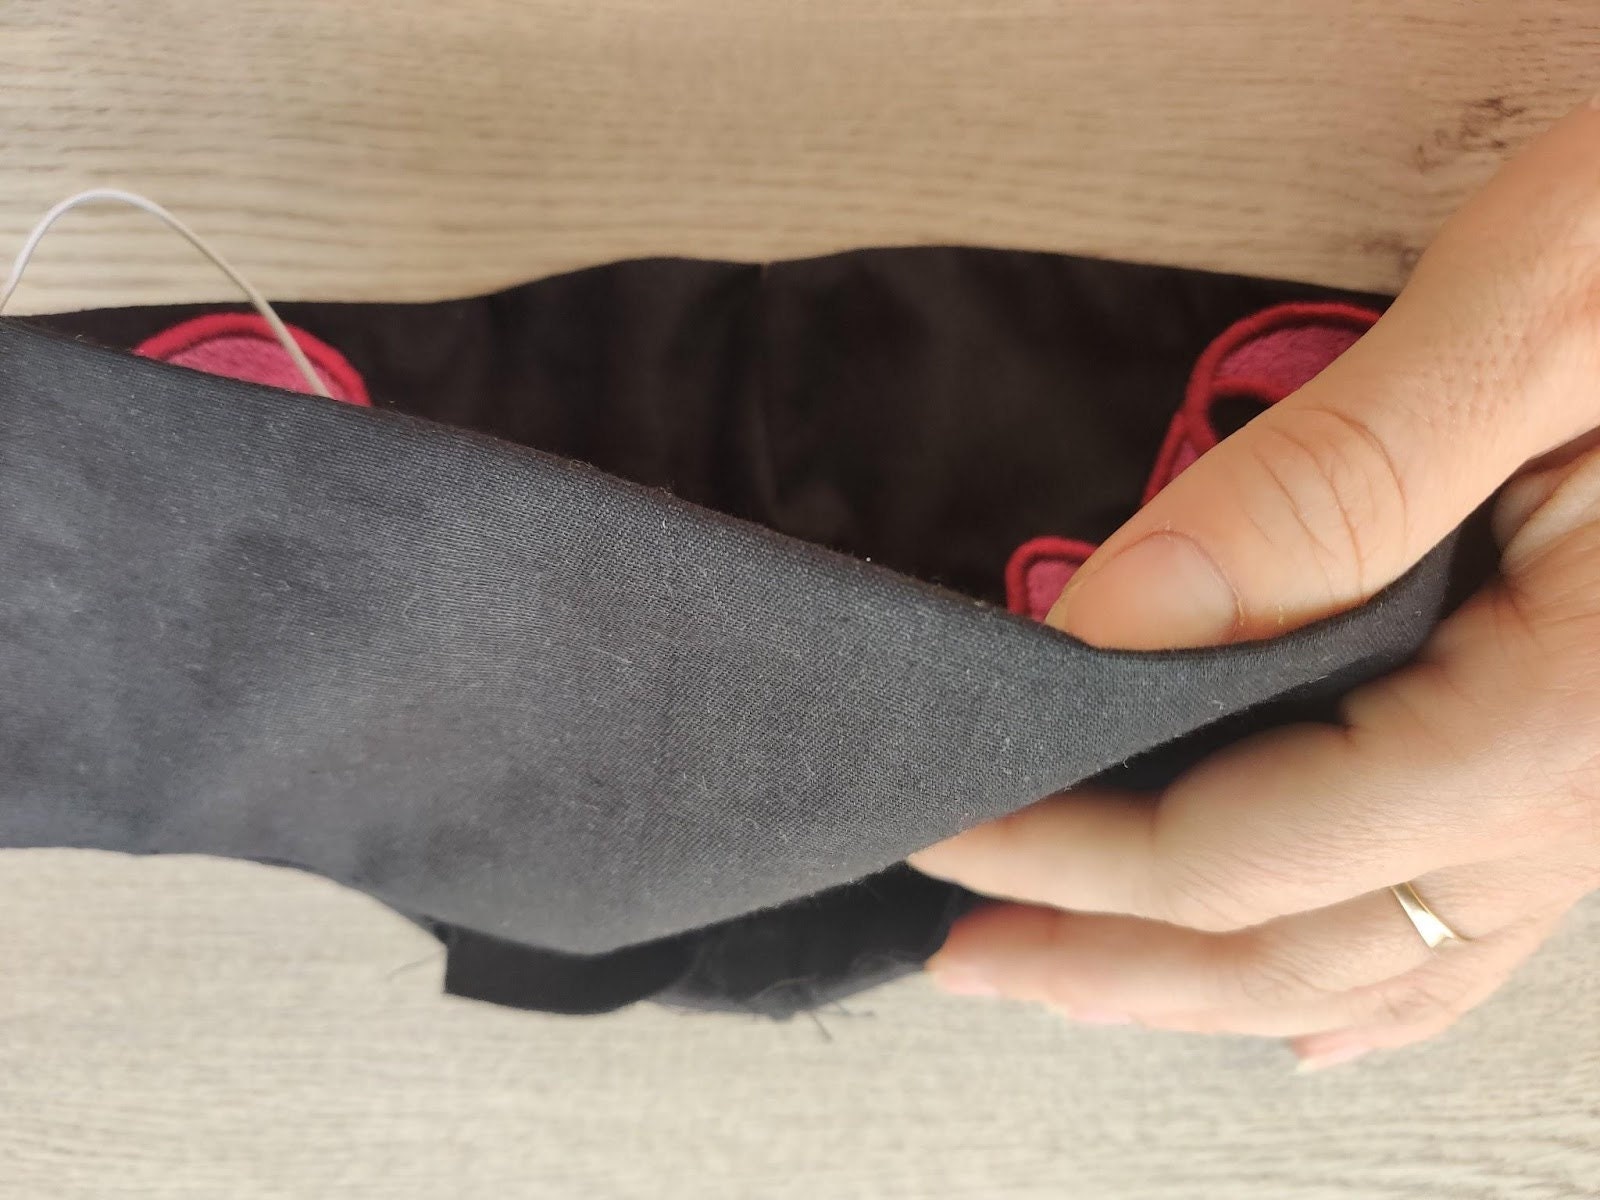
Open the mask and pull the nose part out.
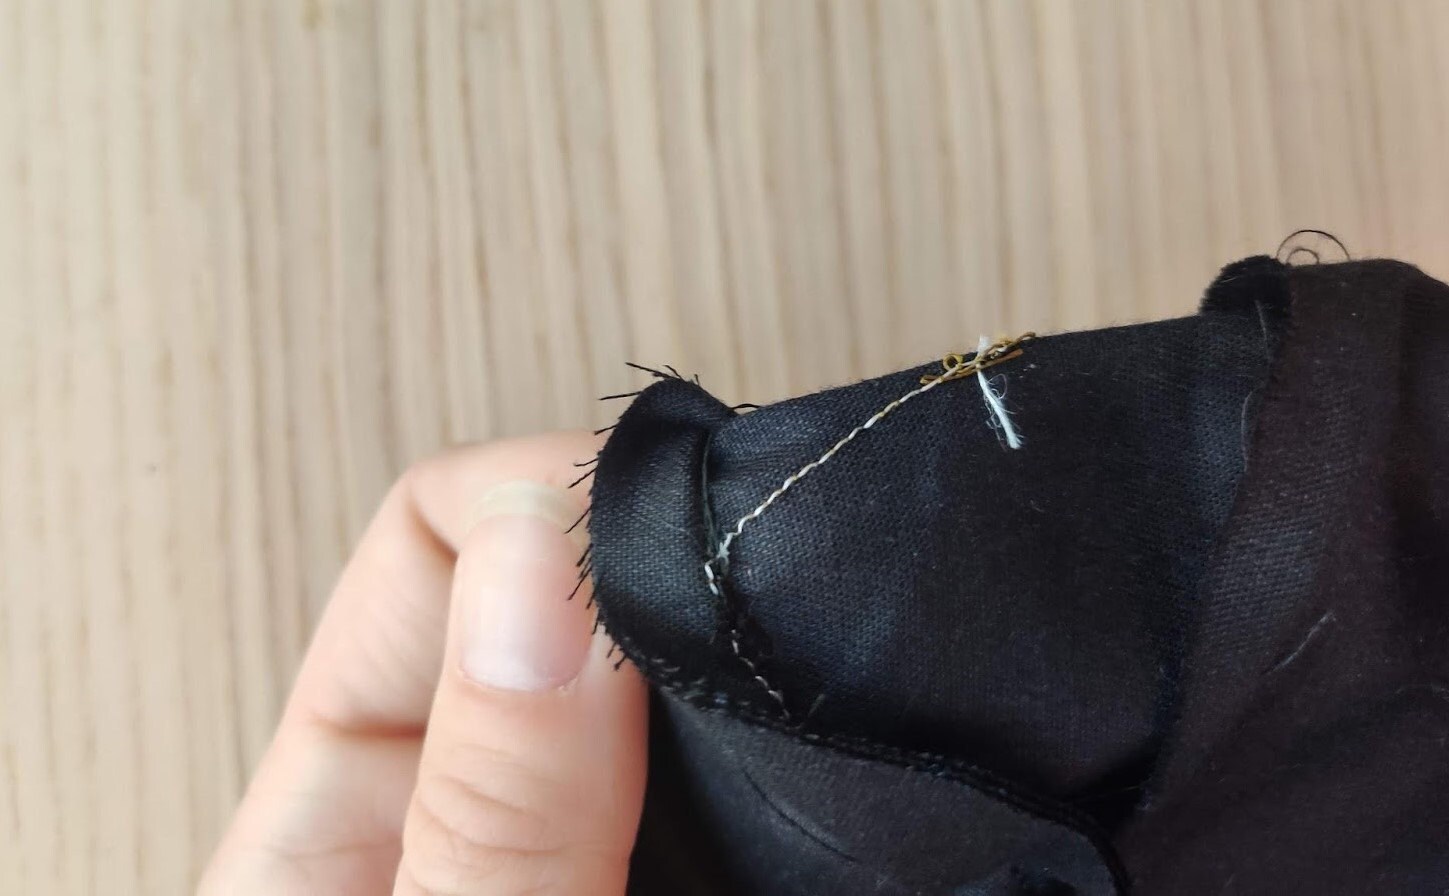
Fold the dart long way in half and stitch with a regular sewing machine along the dieline, approx. 1.4 inch long.
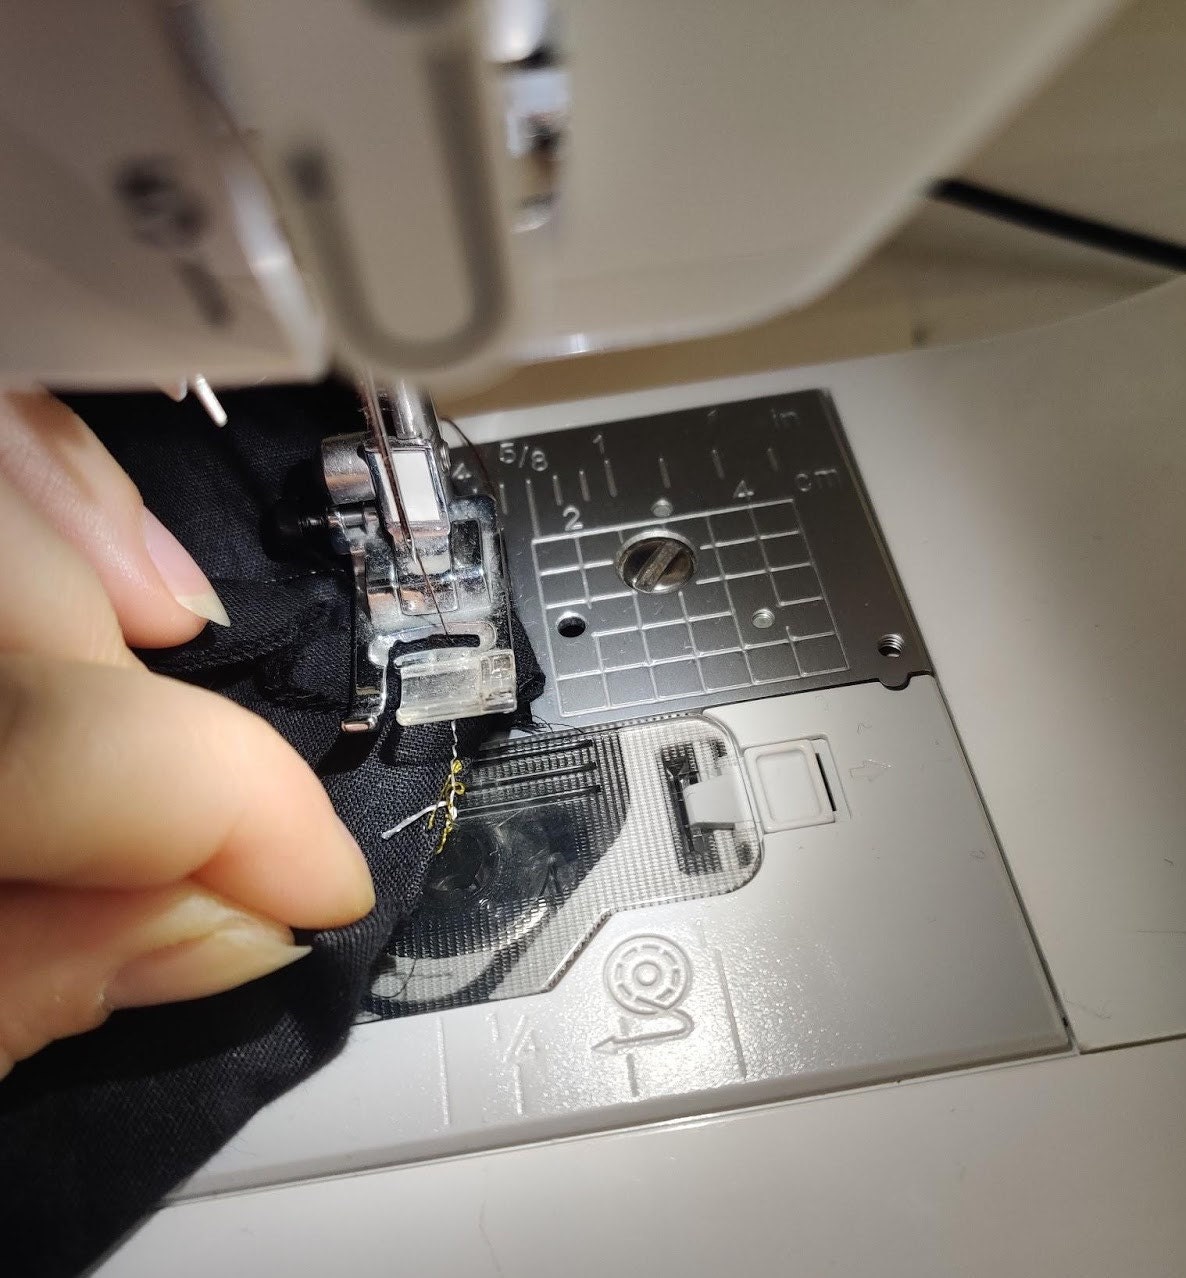
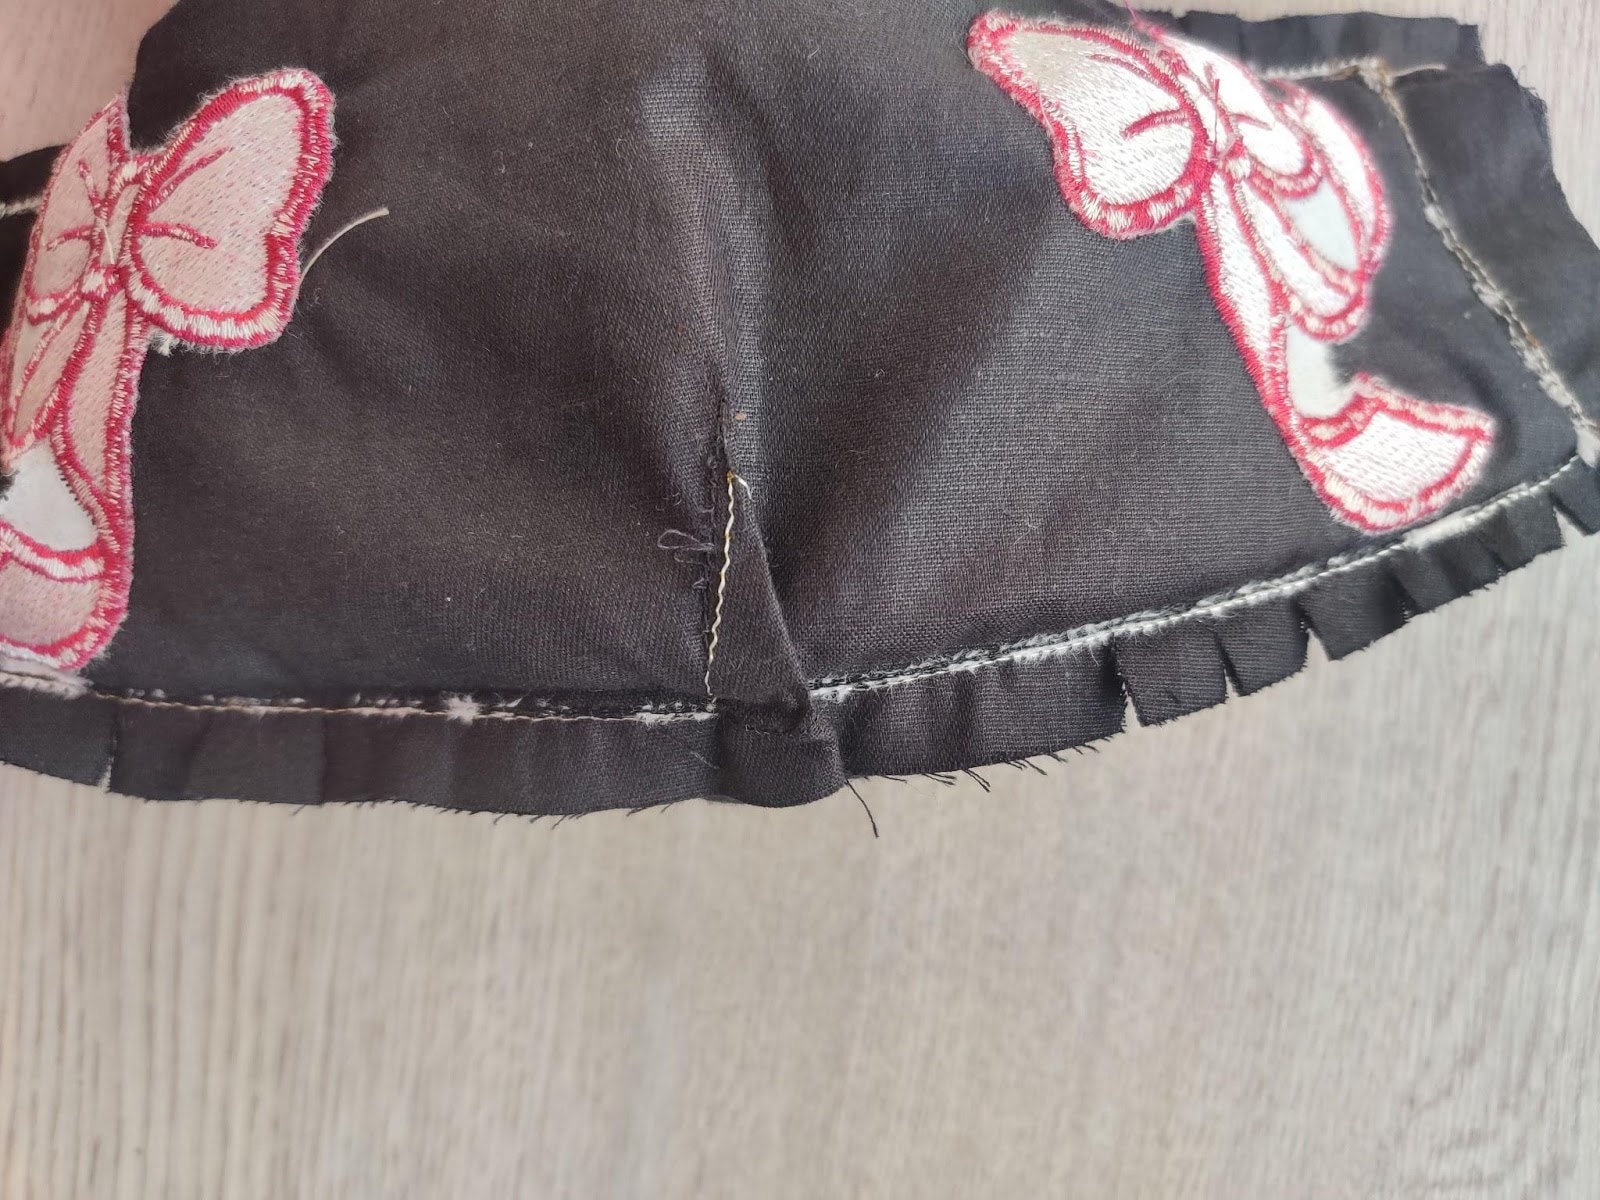
Stitch upper and bottom dart and turn mask back right side.
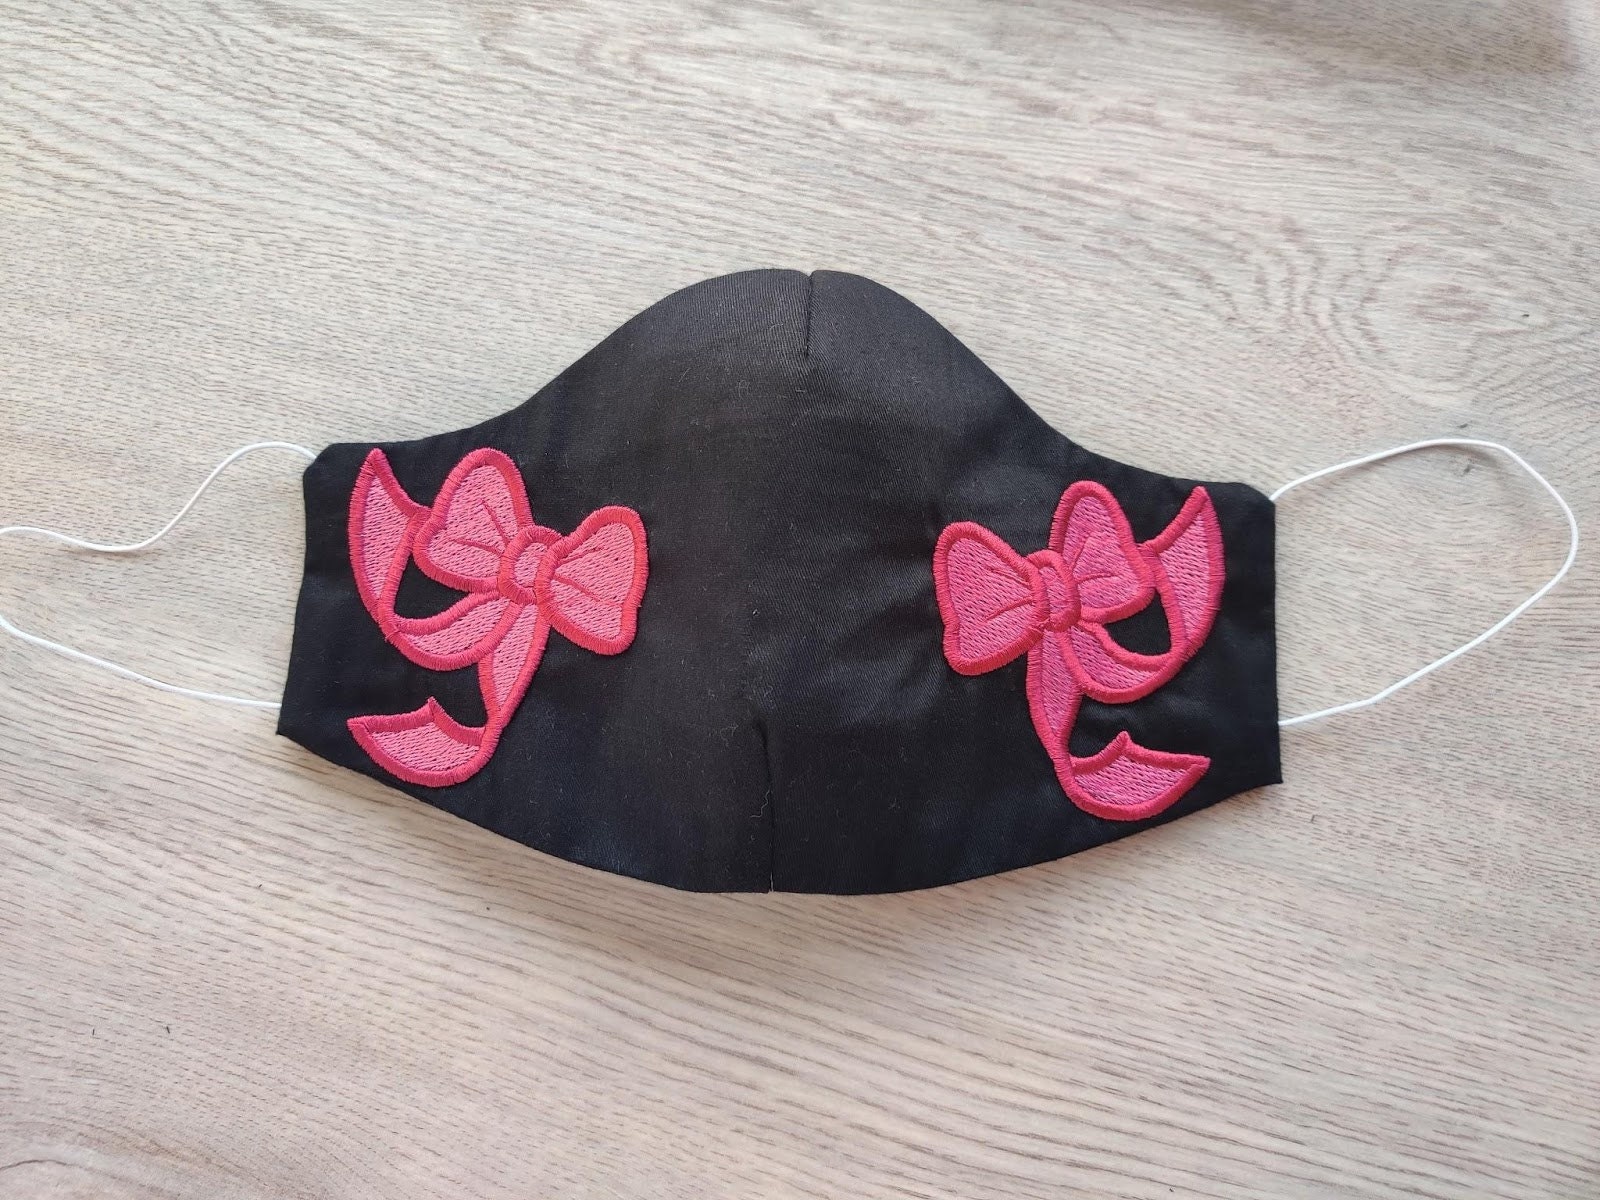
Stay healthy!
Check more Face Mask machine embroidery designs in my Etsy shop Artapli.etsy.com